The Electromagnetic Spectrum (EMS)
S2 lessons on reflection, refraction, lenses, total internal reflection, white light and spectra, coloured light and describing waves. Choose a lesson to open it.
- Lesson 1Law of Reflection
- Lesson 2Refraction
- Lesson 3Lenses
- Lesson 4Total Internal Reflection
- Lesson 5Refracting White Light
- Lesson 6Coloured Light
- Lesson 7More About Colour
- Lesson 8Describing Waves
- Lesson 9Frequency Investigation (coming soon)
- Lesson 10Introducing the Electromagnetic Spectrum (coming soon)
Lesson 1 - Law of Reflection
Learning Intentions
- Know that light can be reflected
- Know the terms:
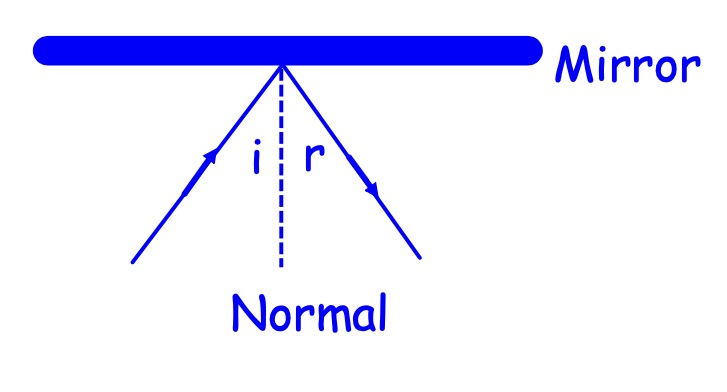
- Normal
- Angle of incidence
- Angle of reflection
- Know the Law of Reflection
Activity: Normal, angle of incidence and angle of reflection
Copy the table below into your notes
| Angle of Incidence | Angle of Reflection |
|---|---|
Collect the following equipment:
- laser ray-box
- paper cut out
- mirror
Set the equipment up as shown below:
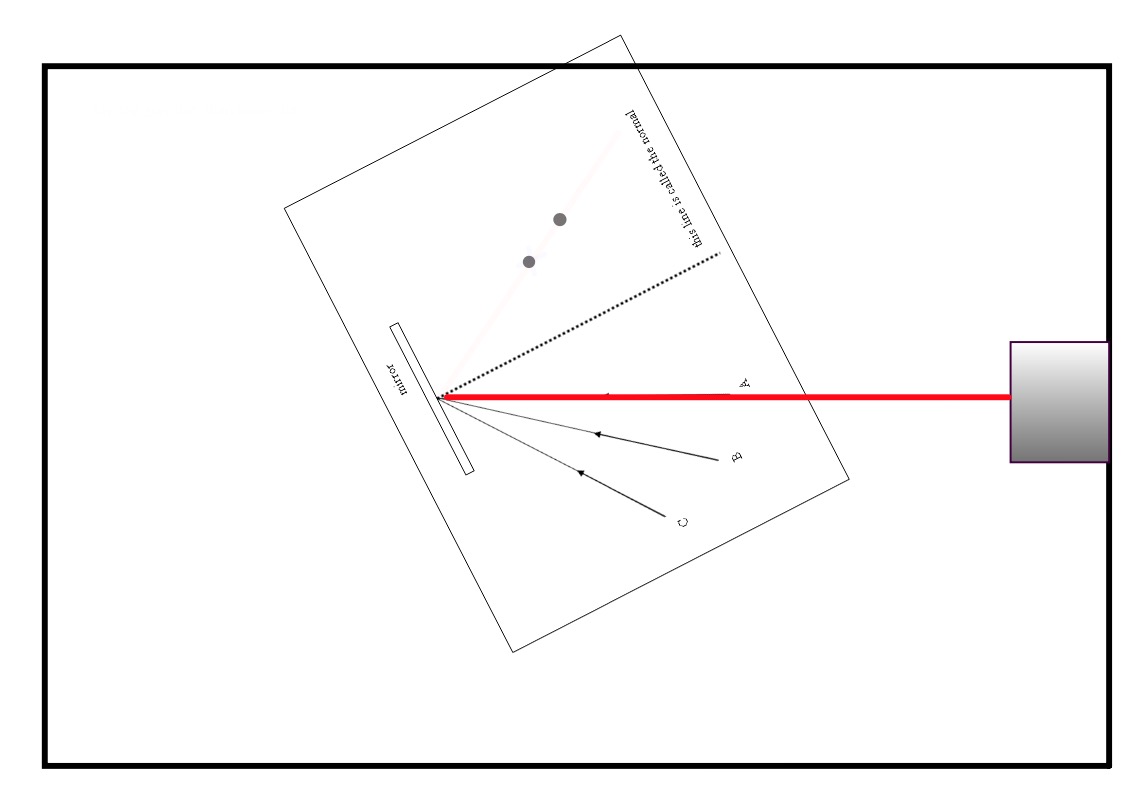
- Shine the ray towards the mirror along the line marked A.
- Mark the reflected ray with a small x.
- Do the same for lines B and C.
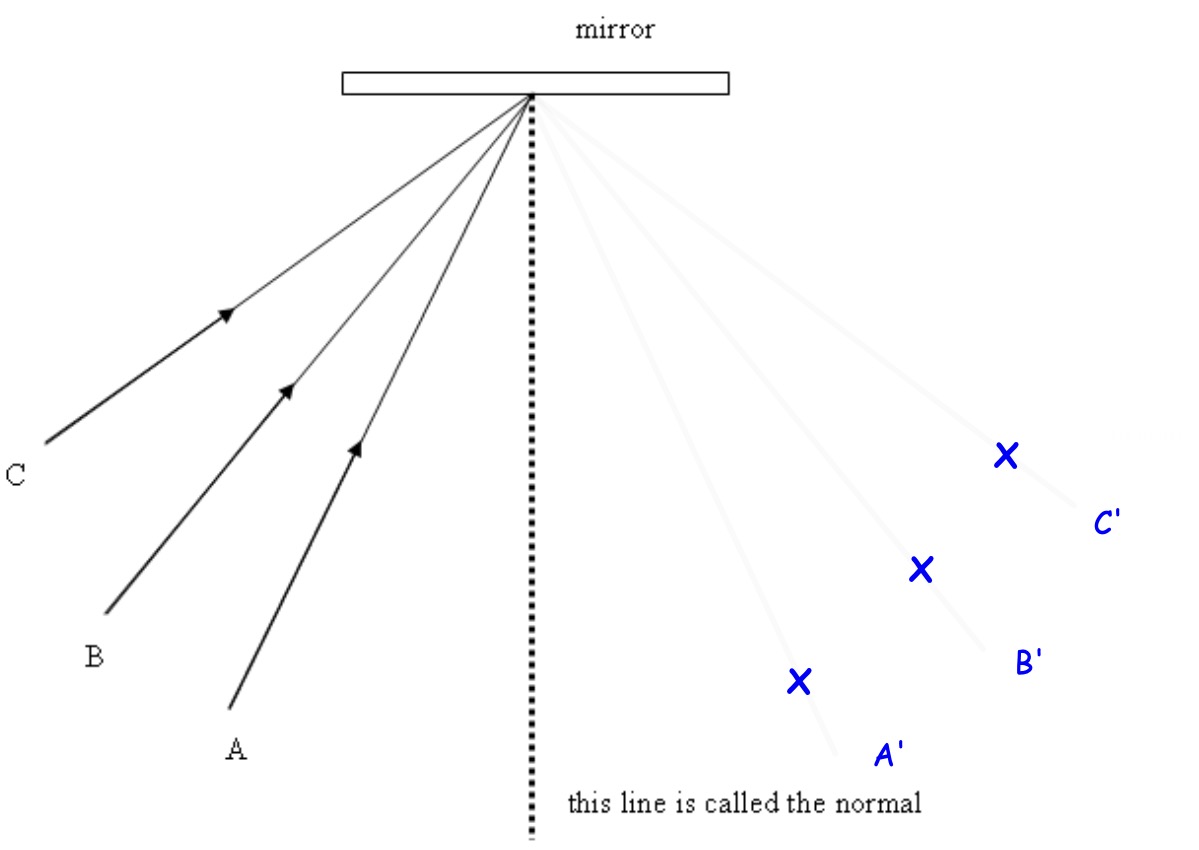
Label the X's A', B' and C', and draw a line through each of them from the reflecting point.
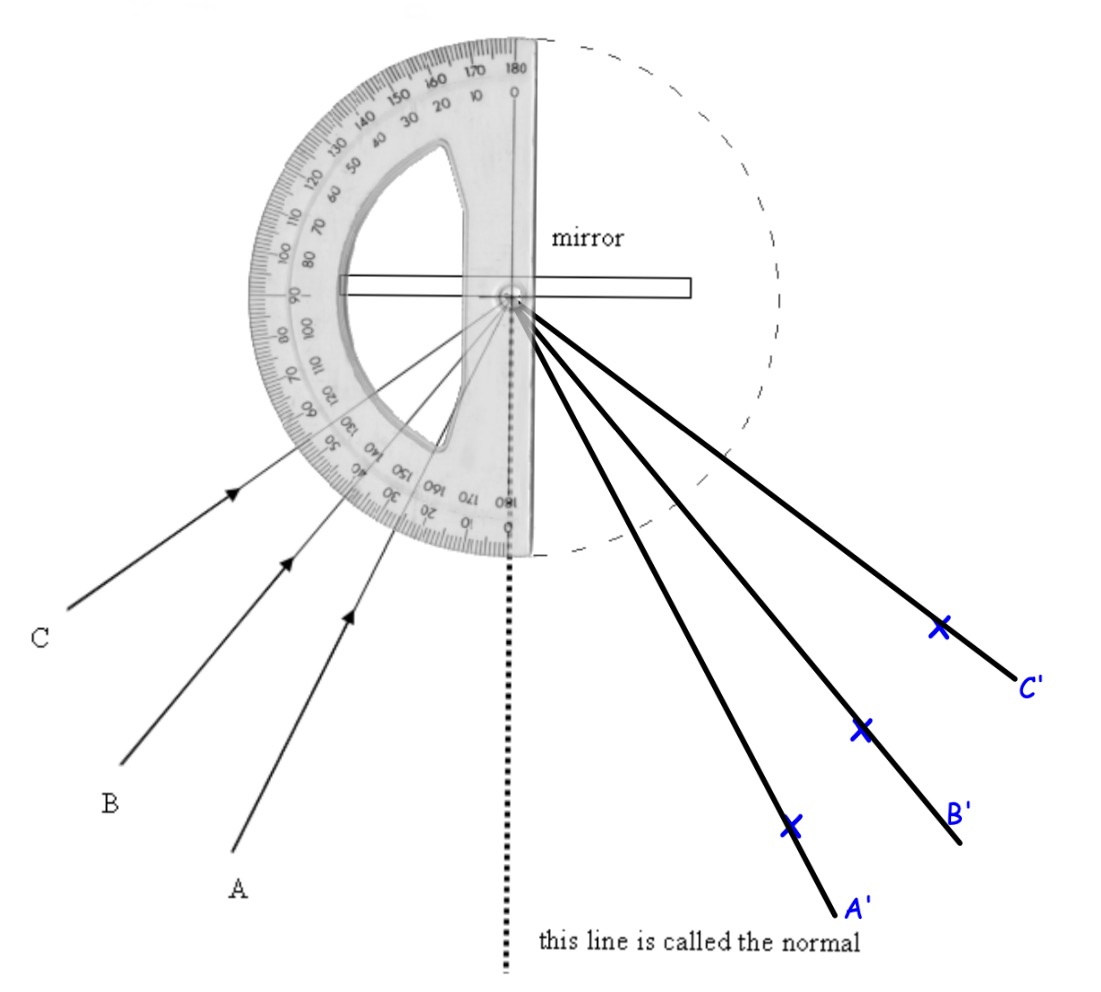
Note: Law of Reflection
angle of incidence = angle of reflection
Lesson 2 - Refraction
Learning Intentions
- State what refraction means.
- Draw diagrams showing what happens to light when it passes from air into glass, or glass into air.
- Social goal: to listen.
What's going on?
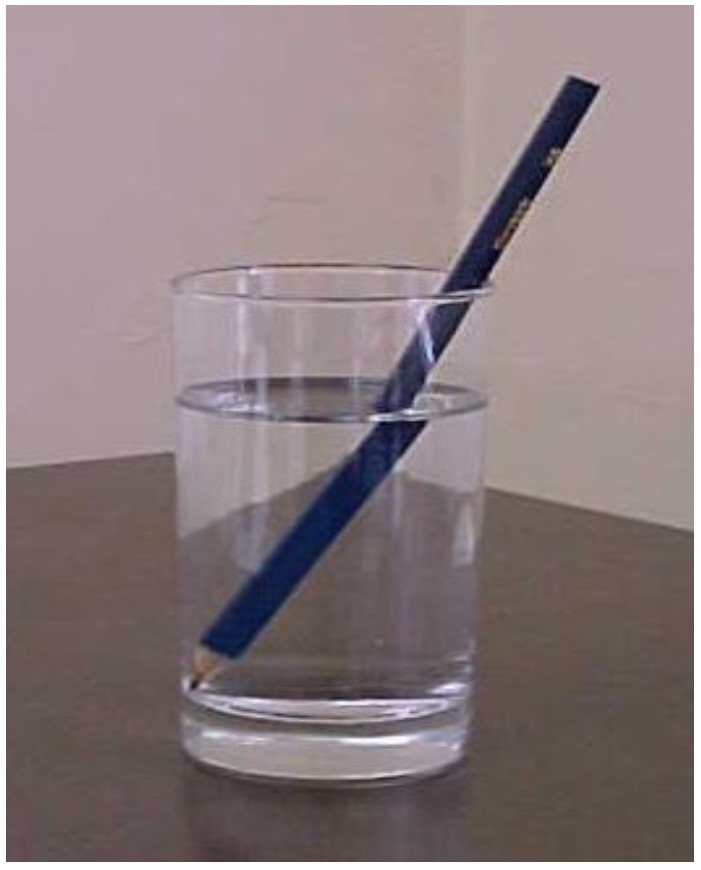
Note - Light
Light is a type of wave. It can pass through substances such as g____ and w____. A substance which it can pass through is called a medium. (Plural is media)
Note - Refraction
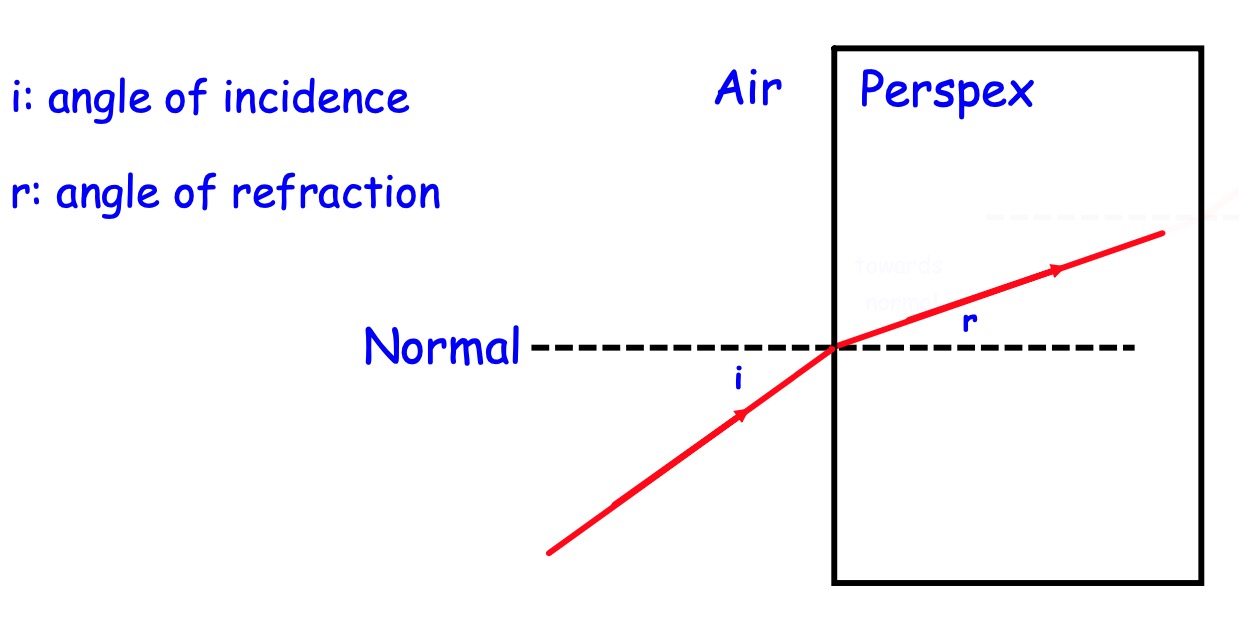
Refraction is when light changes direction as it passes through another material. Light does this because it slows down when it enters the material.
Activity - Refraction
- Find the rectangular perspex block, and draw round it.
- Find the mid point and draw the normal using a protractor.
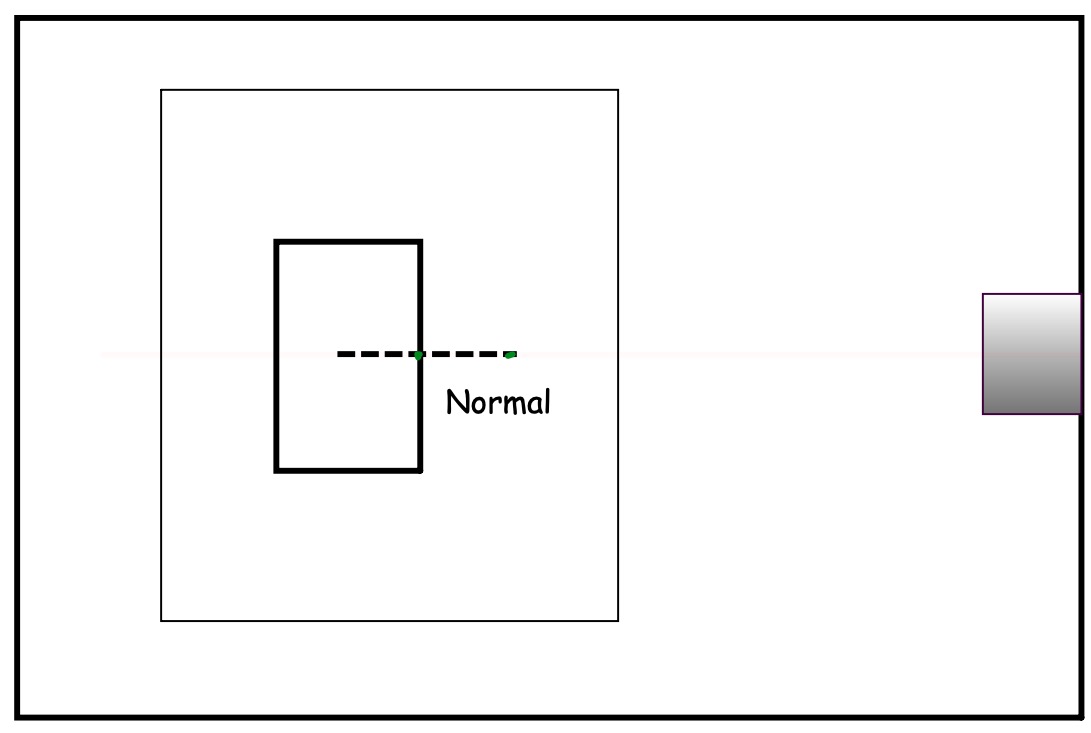
Tilt the paper with the block in place as in the diagram.
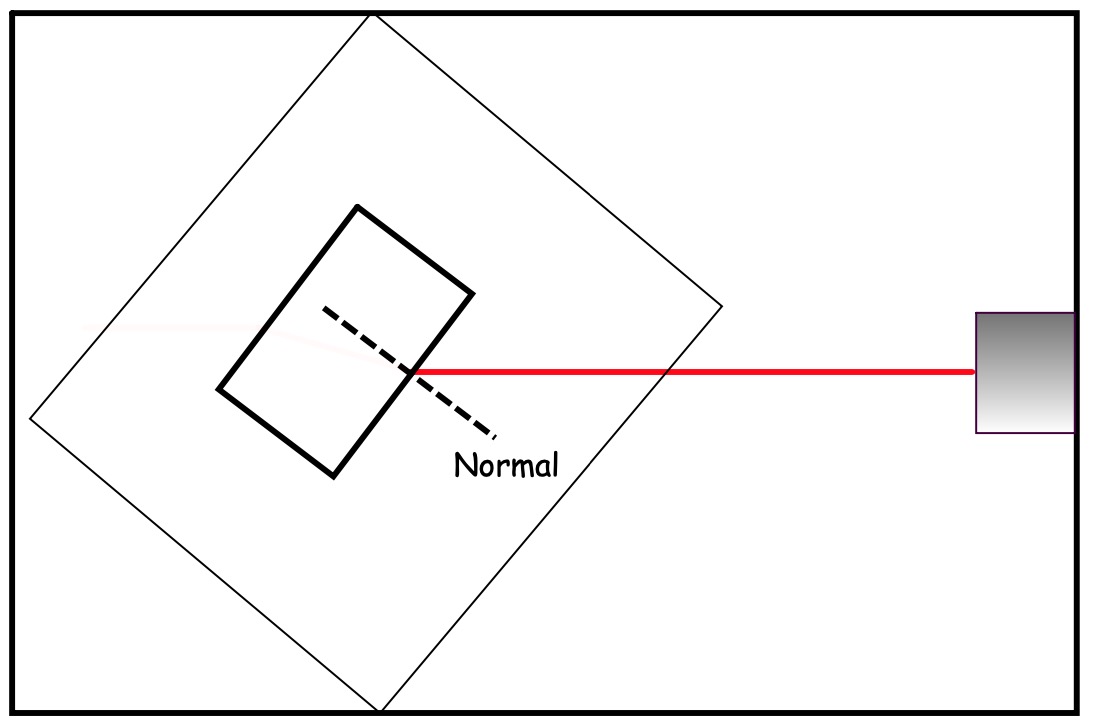
Mark on the paper where the ray goes in and comes out the block, and a few centimetres along the ray.
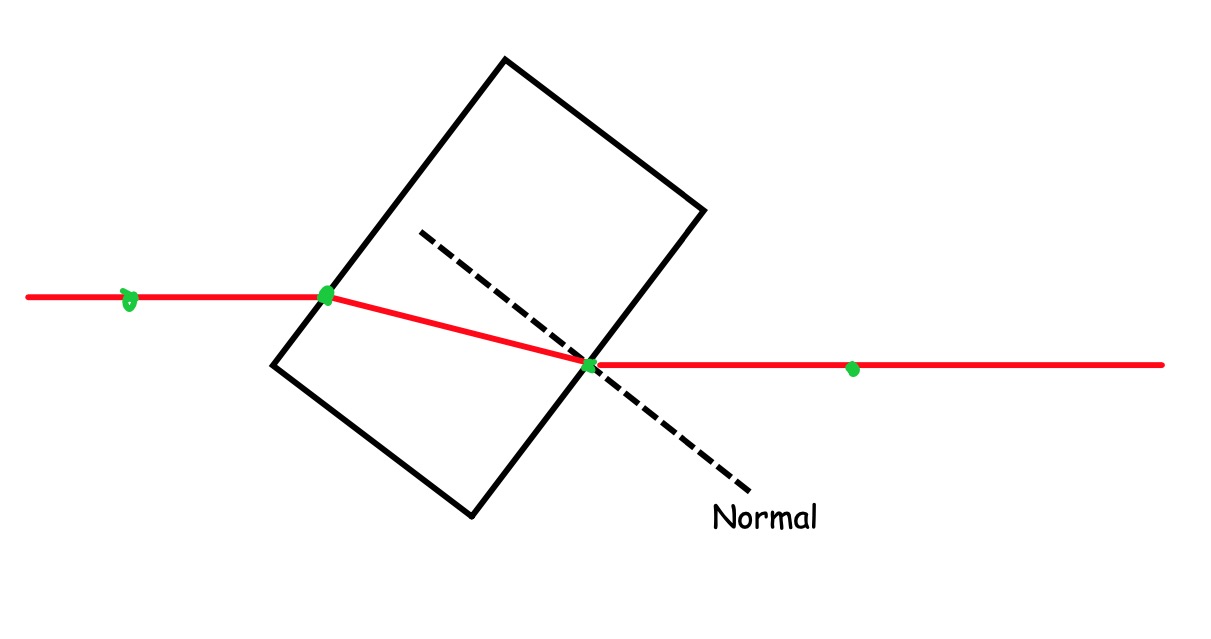
Remove the block, and draw in the rays using the points you've marked.
Note: Refraction
Refraction is when light changes speed and direction when going from one material to another.
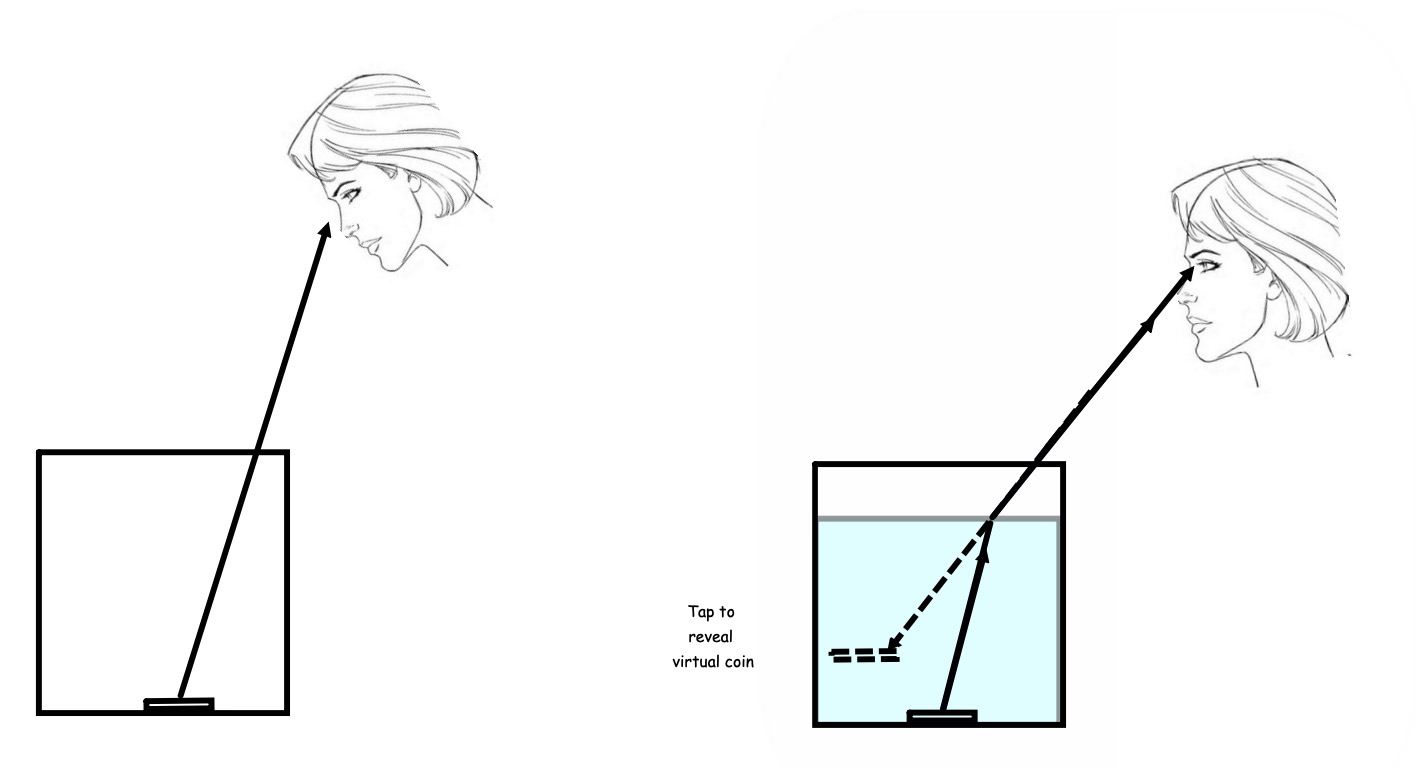
Activity - Cup and coin trick
Split into pairs.
Person A and Person B
Person A collect a cup and a coin from the trolley
Person B collect a glass beaker nearly full of water
Person A Put the coin in the cup and put it on a bench. Lower your head down until you JUST stop seeing the coin. Keep your head in that position!
Person B pour the water slowly into the cup, taking care not to move the coin!
Person A What do you see?
Swap and do the experiment again!
Cup and coin trick - what's going on?
Lesson 3 - Lenses
Learning Intentions
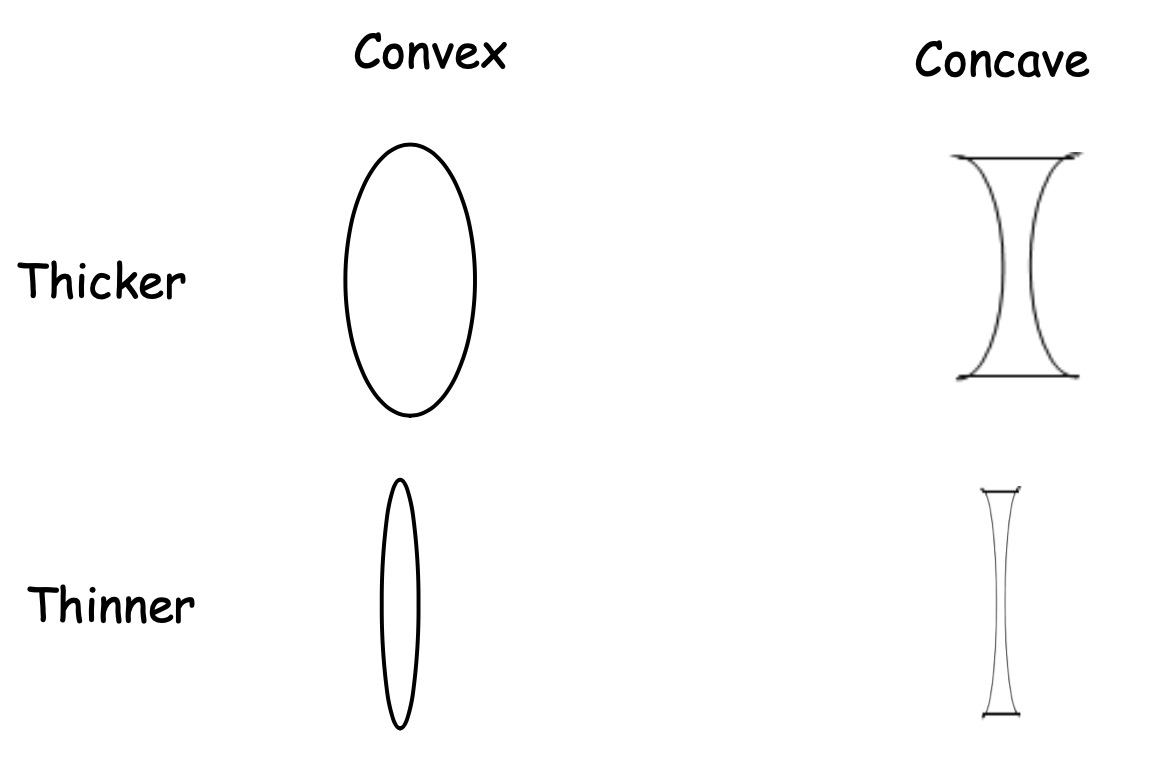
- Describe the shape of convex and concave lenses.
- Describe the effect of convex and concave lenses on parallel rays of light.
Note - Types of Lens
Activity - Lenses
Thicker Convex Lens
On a blank piece of paper, draw a straight line using a ruler.
Draw round a lens so that it's at right angles to the line.
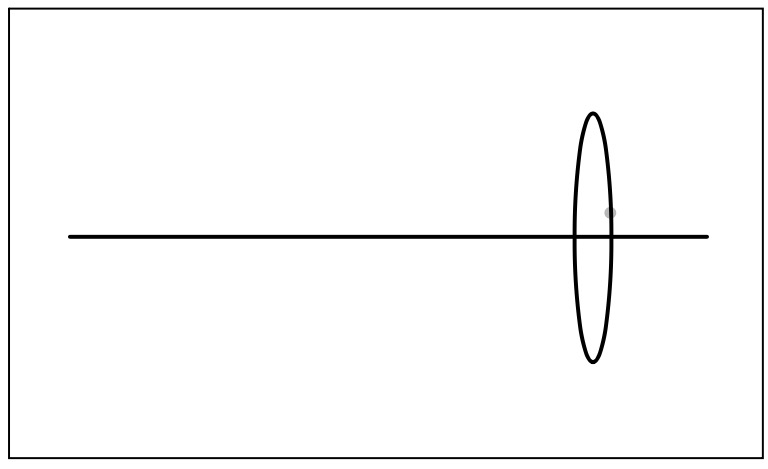
Put your diagram on the laser board so the middle ray goes along the straight line.
Place the lens on the outline.
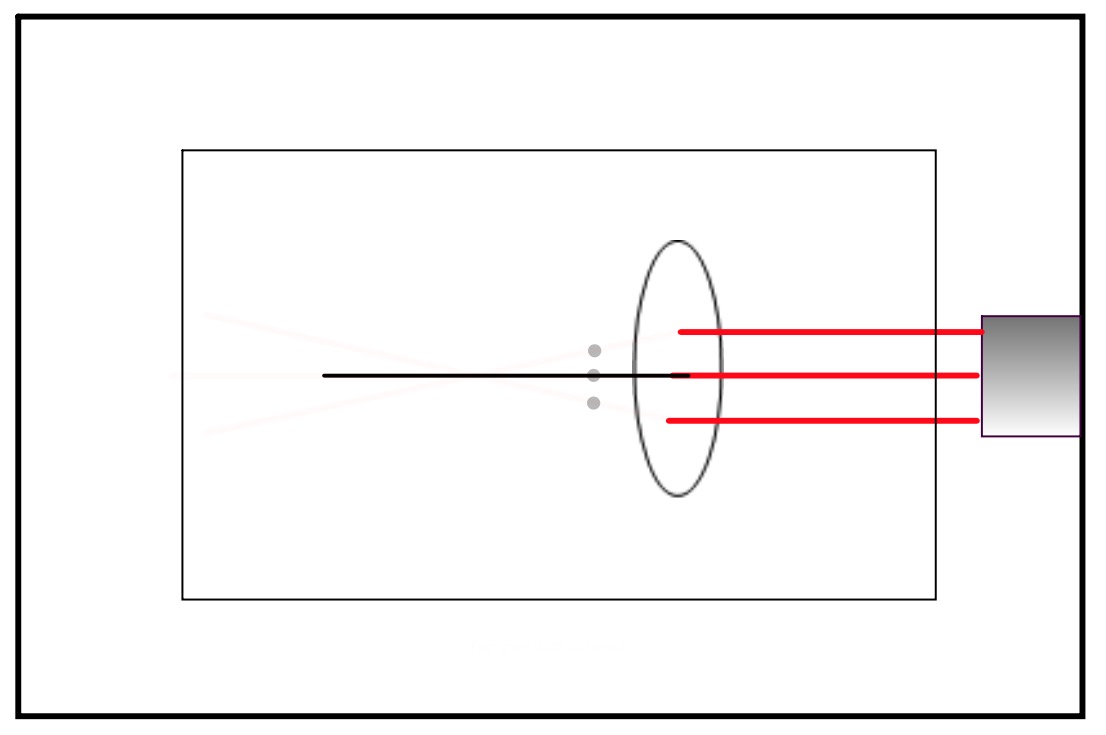
Repeat the above instructions with the thinner convex lens, thicker concave lens and thinner concave lens.
Notes - Lenses
Complete a copy of the handout below and stick into your notes.
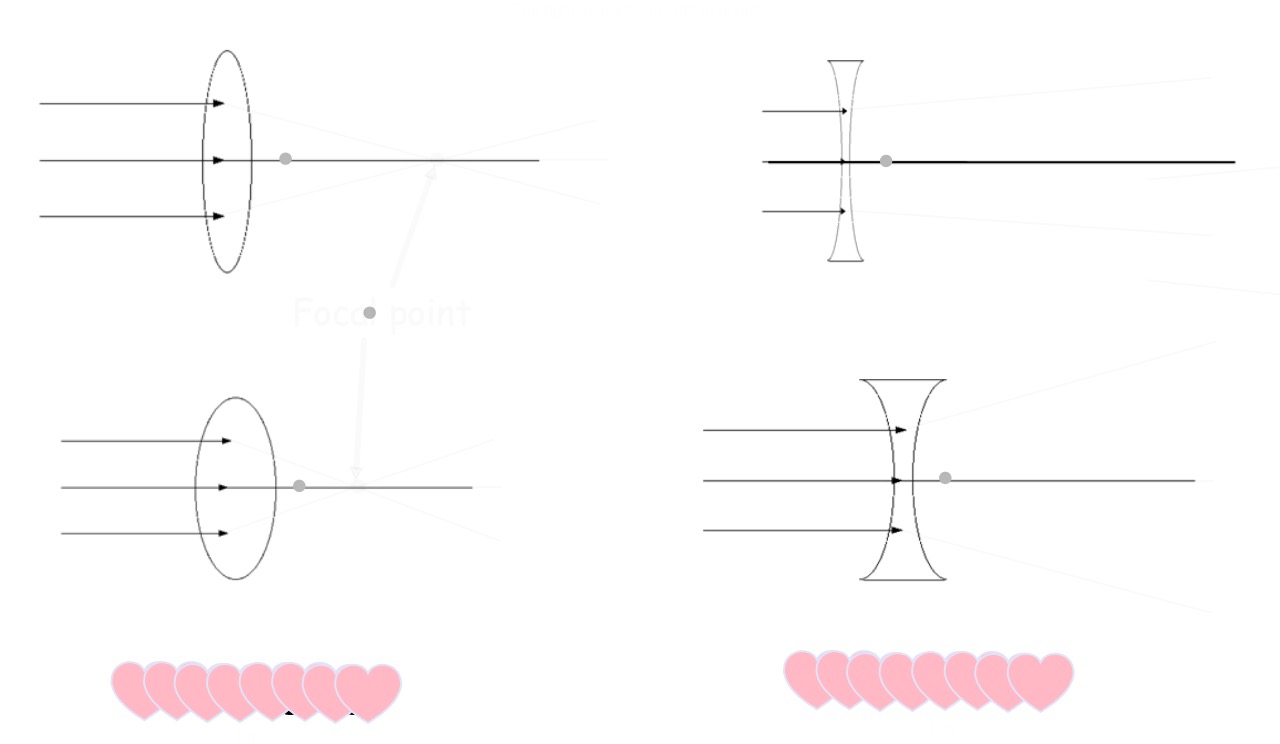
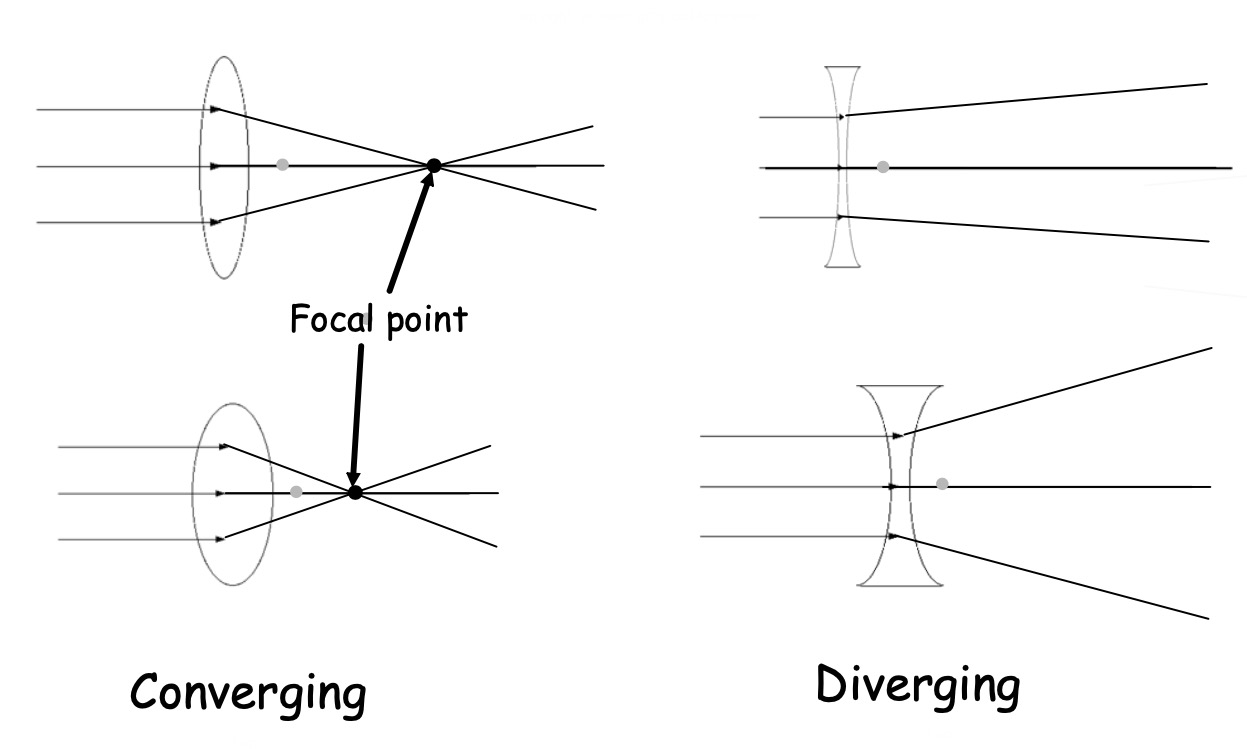
Eyesight and Lenses
As you get older, your sight usually gets worse. There's not much you can do to stop this happening - it's a condition called presbyopia.
So if you don't wear glasses already, you probably will when you're older. So how do glasses work to correct our sight?
The two pieces of glass or plastic in front of your eyes are called lenses. Lenses turn up all over the place - in telescopes, for example.
Questions
1. What is the name of the condition that causes sight problems as you get older?
2. List three things, not mentioned above, that use lenses.
3. Name the two main types of lens.
4. What are the other names for the lenses?
Lesson 4 - Total Internal Reflection
Learning Intentions
- Describe what is meant by total internal reflection and applications.
- State what is meant by the critical angle.
- Know that light can be used to transmit information.
Total Internal Reflection
Activity - Total Internal Reflection
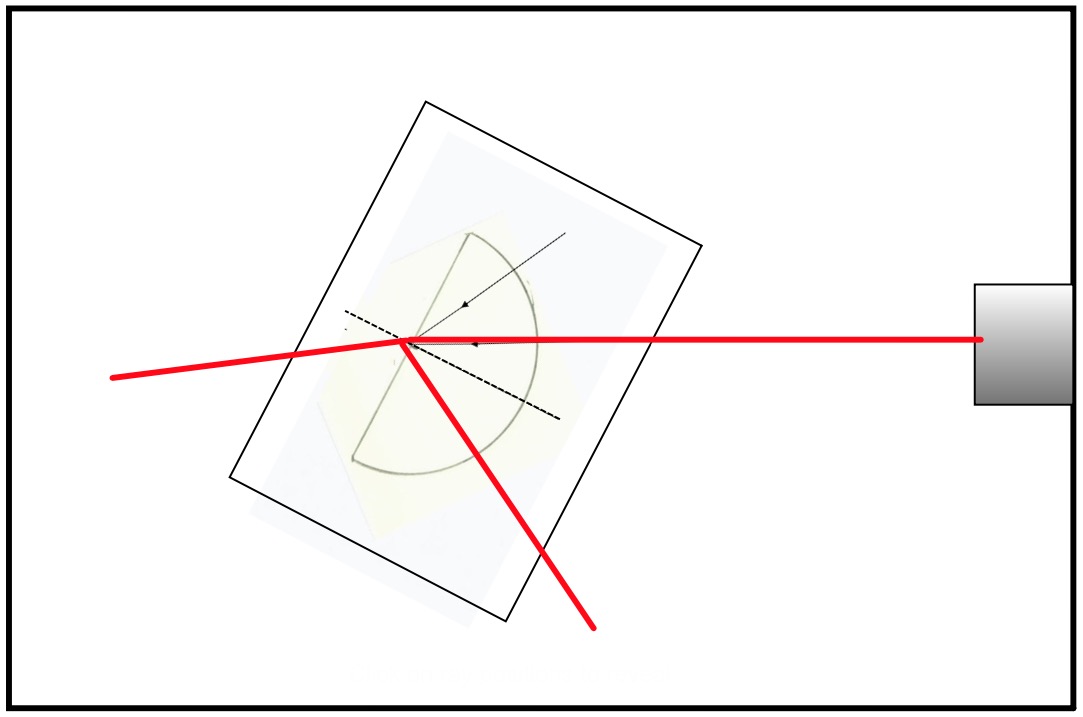
Mark small crosses on the paper where the rays emerge from the block.
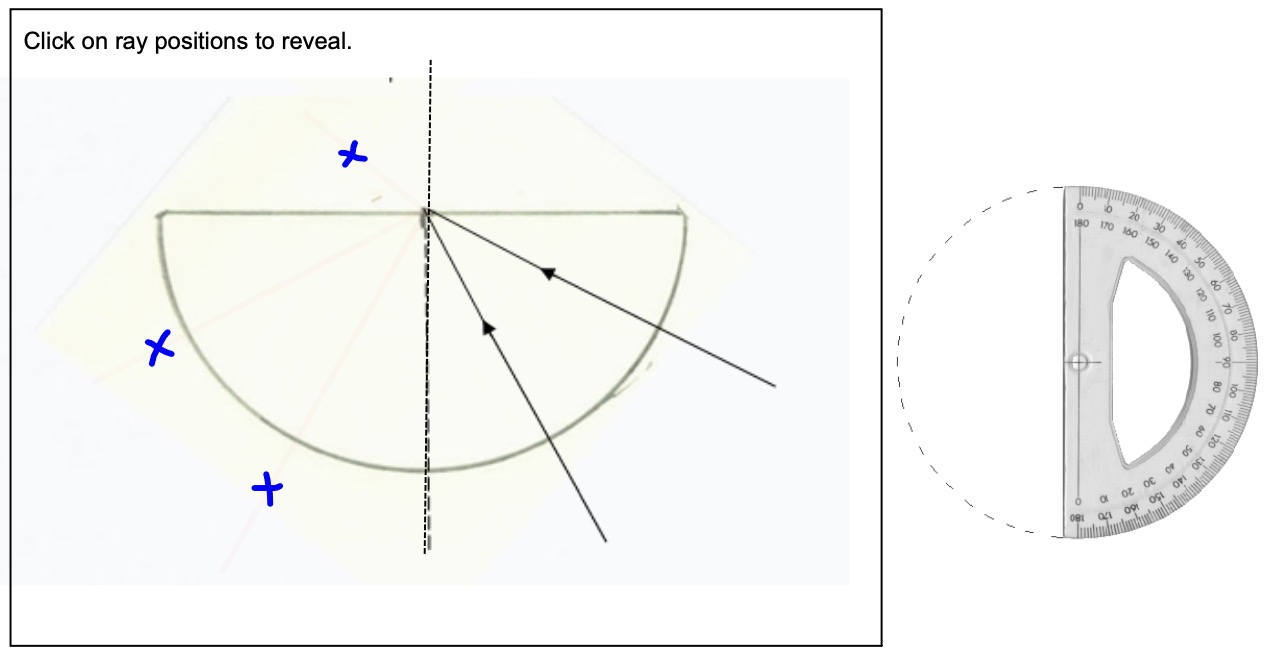
Use a protractor to measure:
- The angles of incidence.
- The angle of refraction.
- The angles of reflection.
Notes - Total Internal Reflection
The smallest angle of incidence for which the ray is totally reflected is called the critical angle. When all the light is reflected, it is called Total Internal Reflection.
Optical Fibres
Copy this diagram showing the path of the ray of light in the optical fibre.
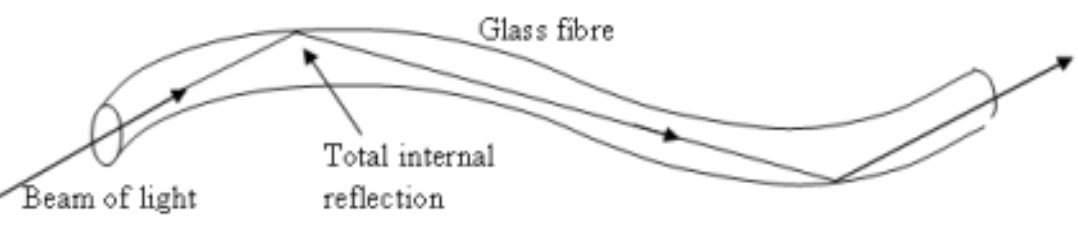
Do you know what optical fibres are used for?
Lesson 5 - Refracting White Light
Learning Intentions
- To find out what happens when white light is refracted through a triangular prism
- To find out how light can be used to find out about distant stars
Prism
Click on the picture below for link to video.
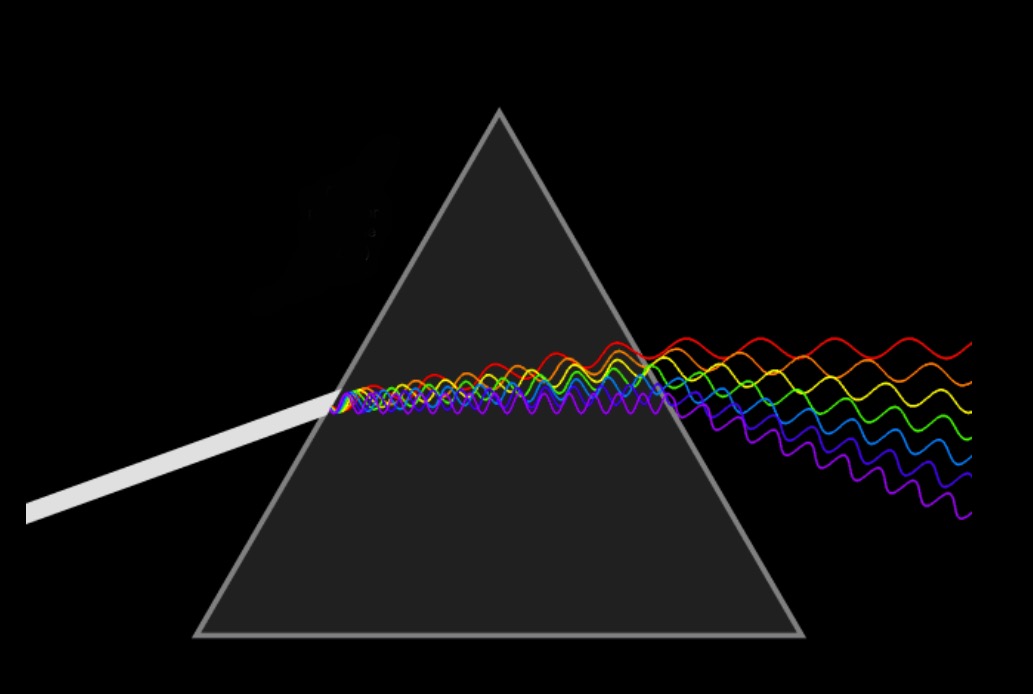
Activity - Refracting White Light
You'll need a ray box with a single slit, a power supply, a triangular prism and a screen made of white card.
Set up your equipment like this.
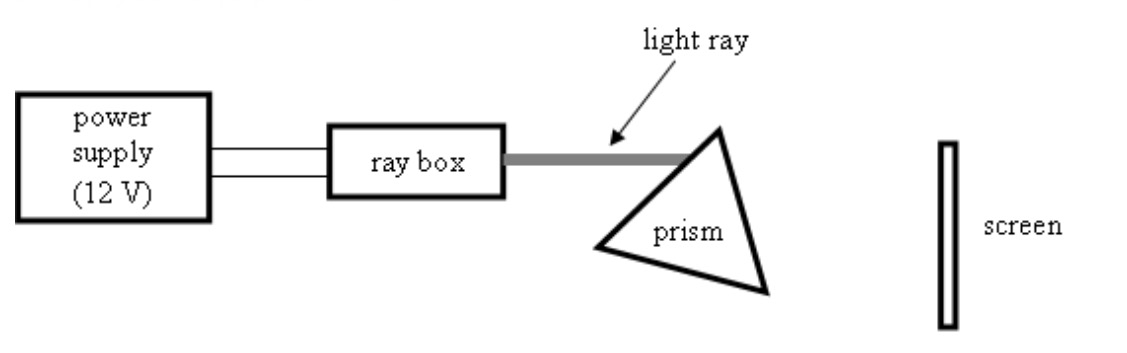
Point the light ray near the top corner of the prism. Now turn the prism slowly, keeping an eye on the screen.
- Describe what you see.
- Where have you seen this sort of pattern before?
- List the different colours you can see.
Notes - Refracting White Light
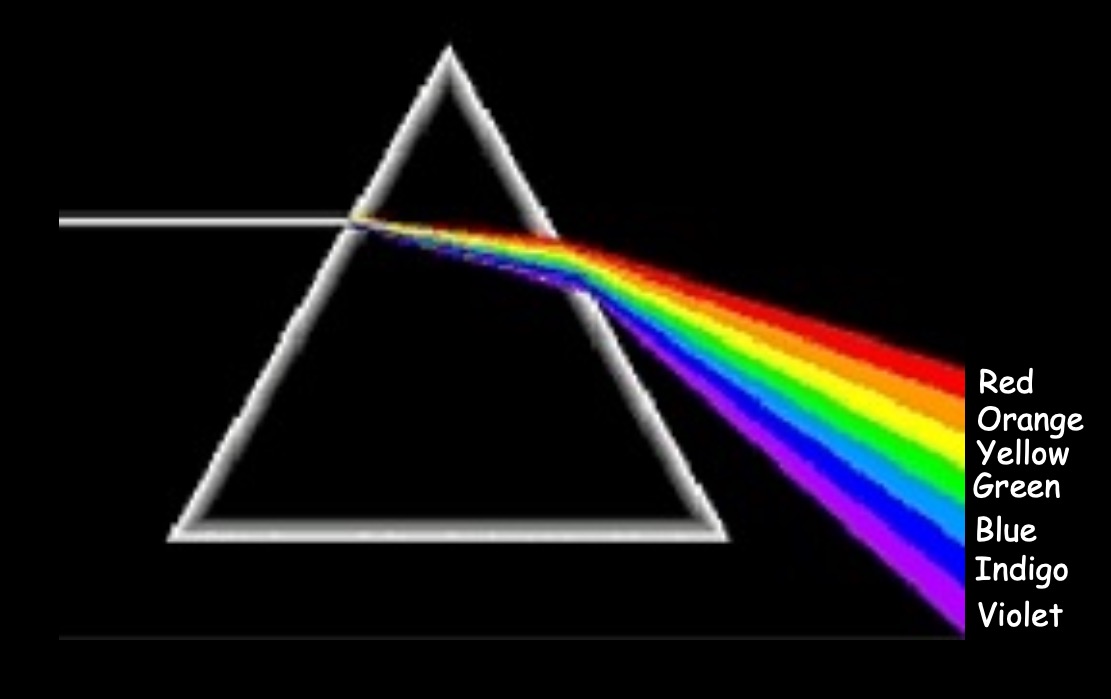
White light contains all of the colours and produces a continuous spectrum.
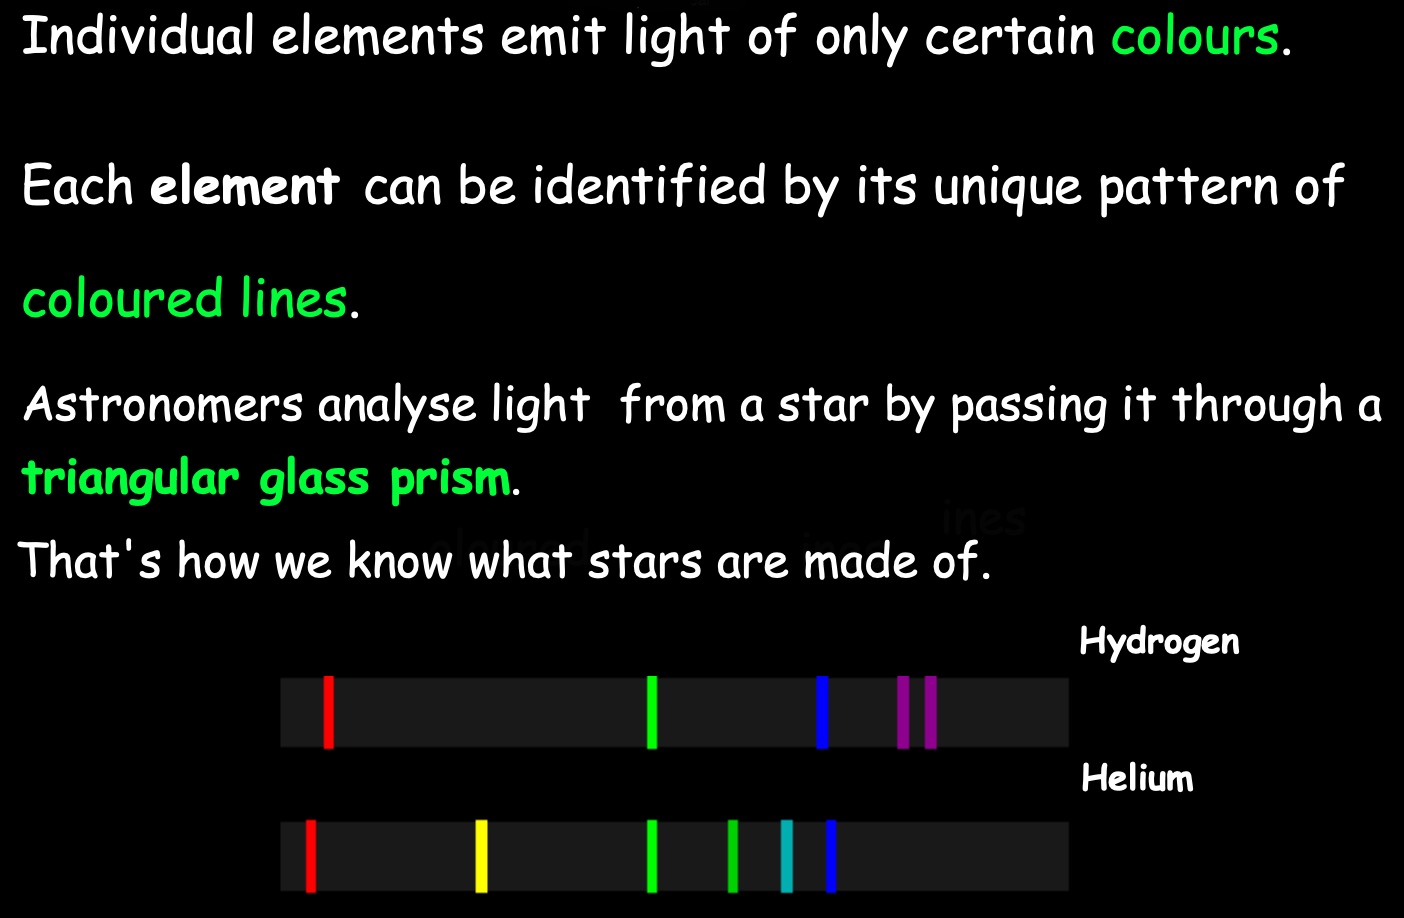
How do astronomers get information from distant stars?
Collect a spectroscope and look at some light sources.
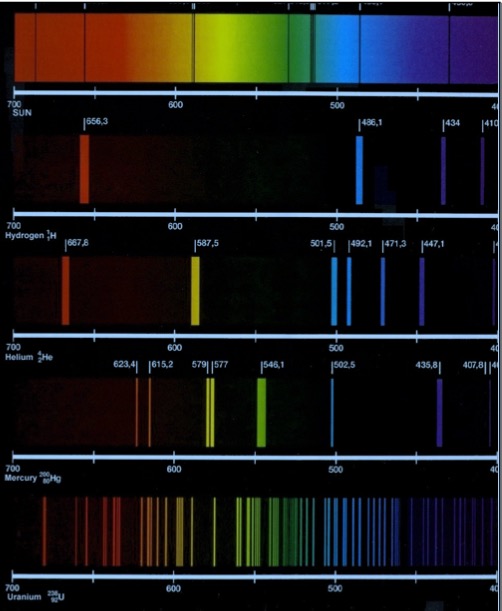
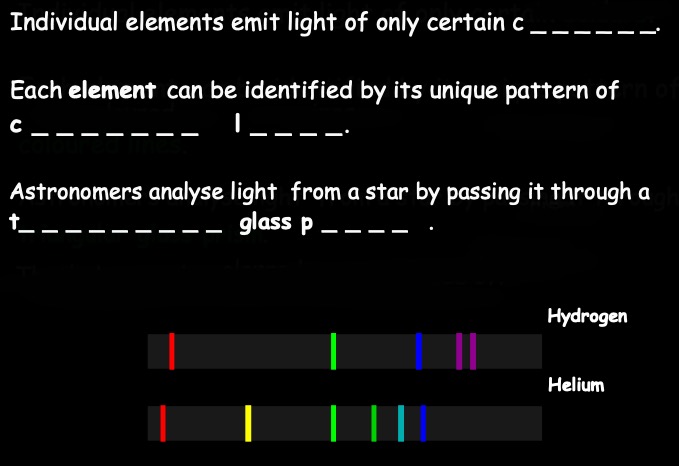
Notes - Emission Spectra
Rainbows and Raindrops
Rainbows form due to refraction and reflection of light in rain droplets. It only happens at certain angles and the sun has to be in the perfect position.
Lesson 6 - Coloured Light
Learning Intentions
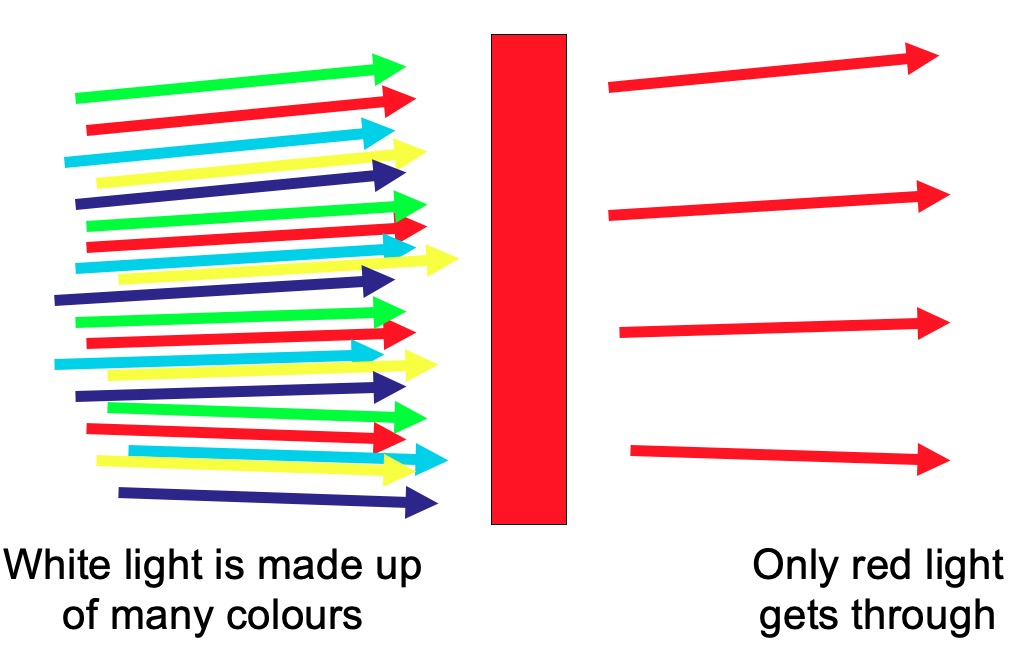
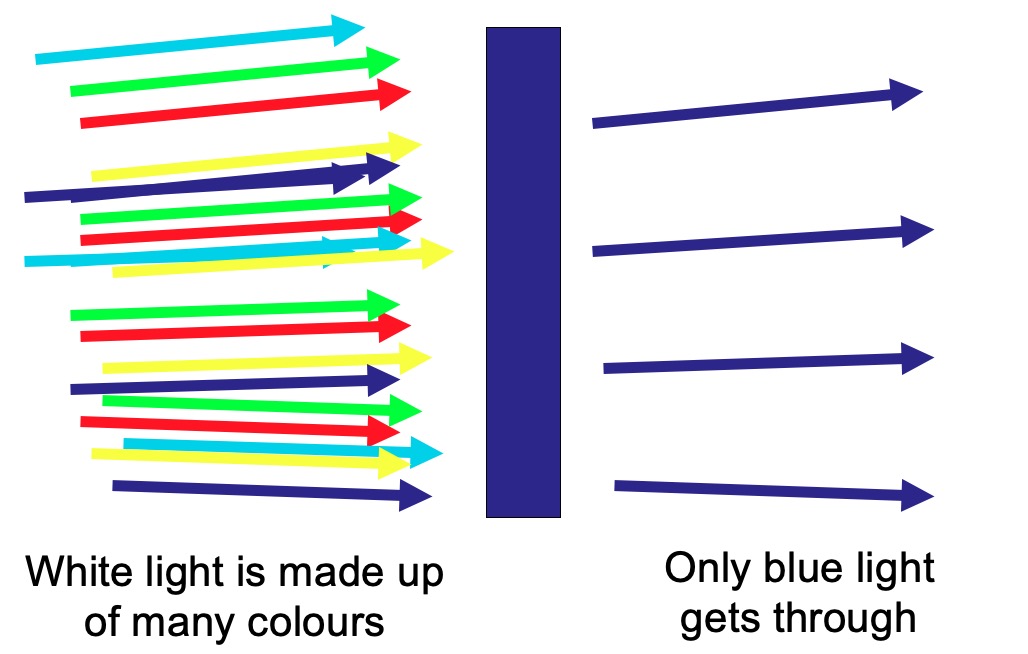
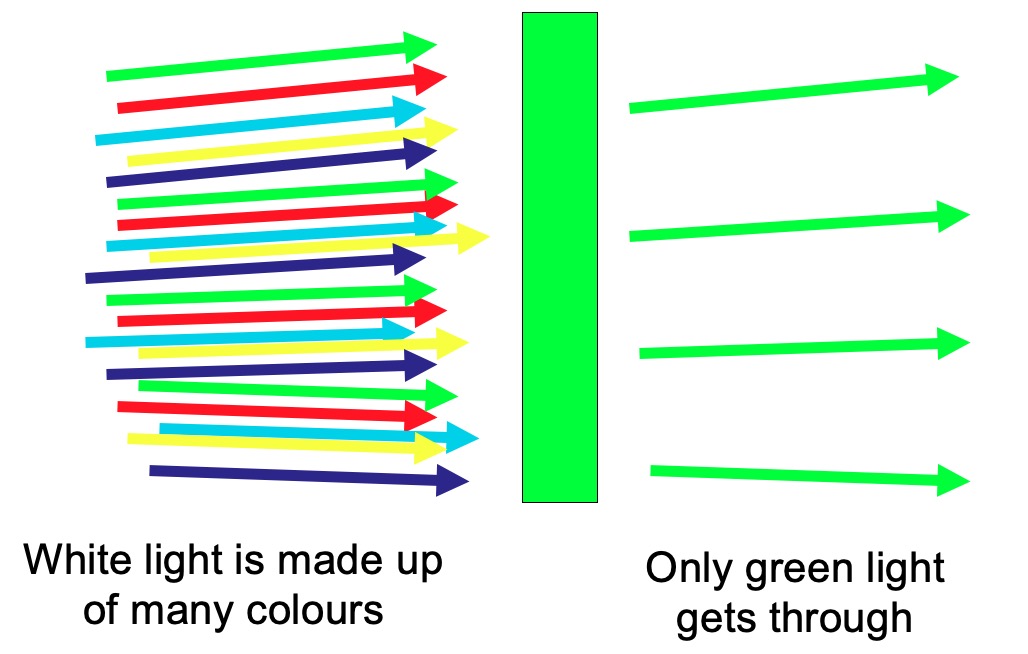
- Explain the effect of filters on white light
- Know what the three primary colours are.
- Know what colours are made when primary colours are mixed.
Seeing through coloured filters
Collect a set of coloured filters.
Red Filter
Blue Filter
Green Filter
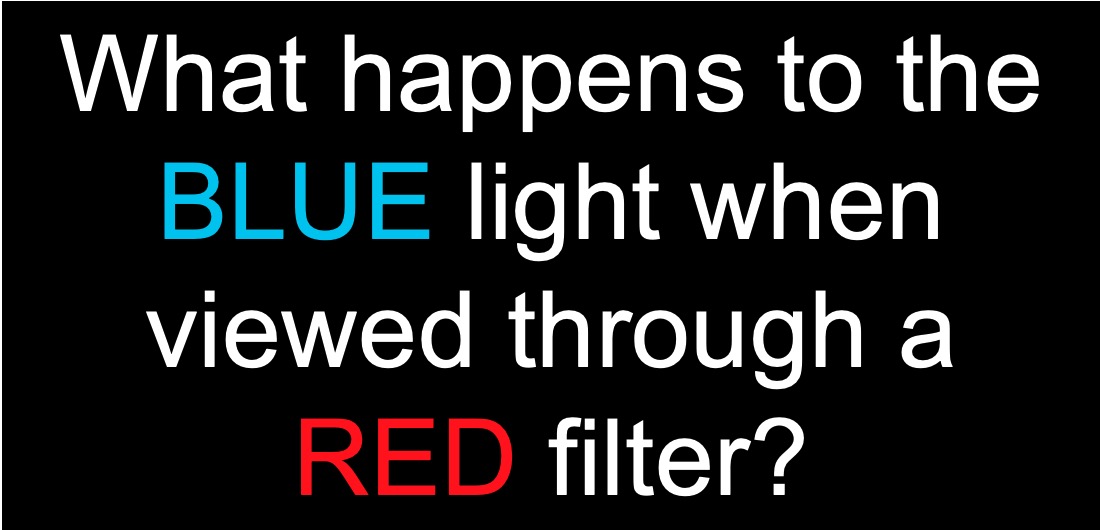
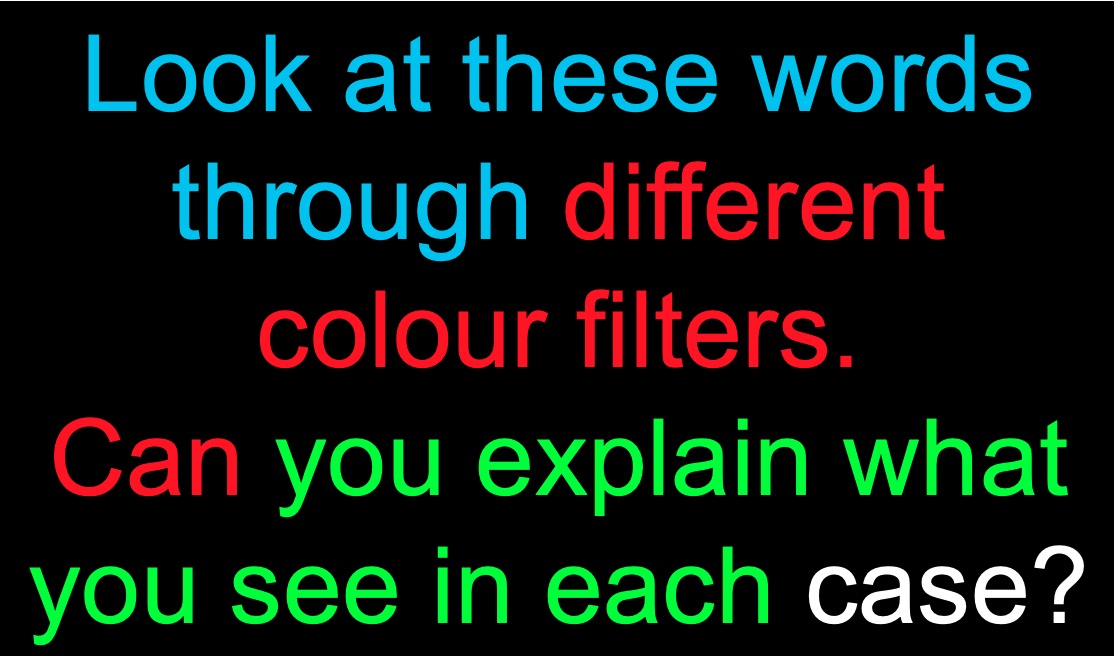
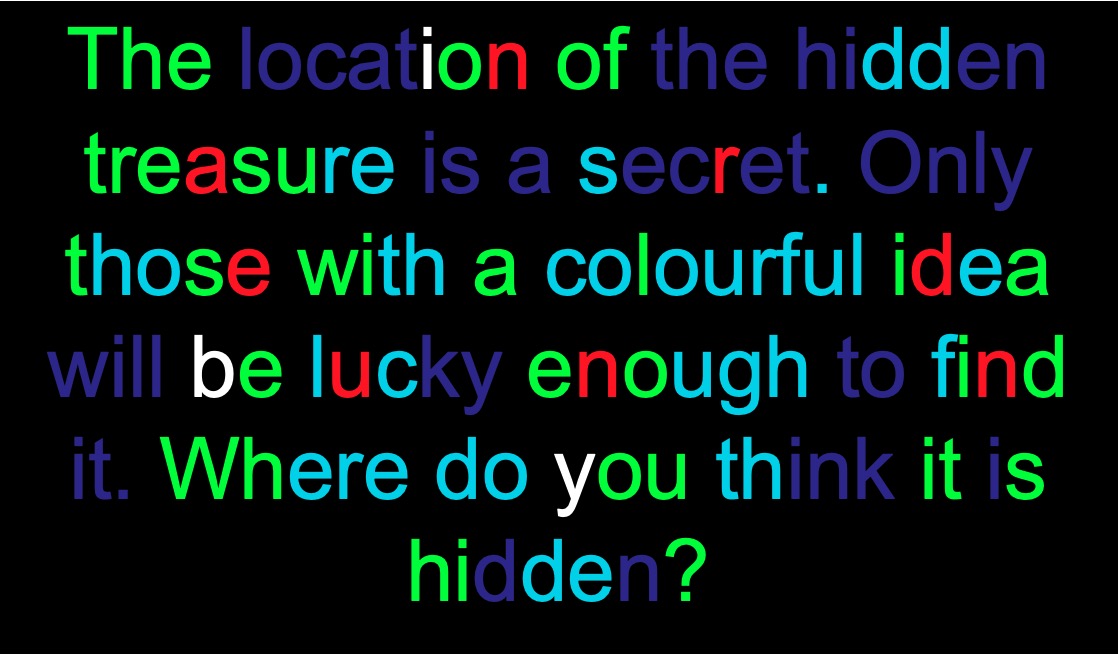
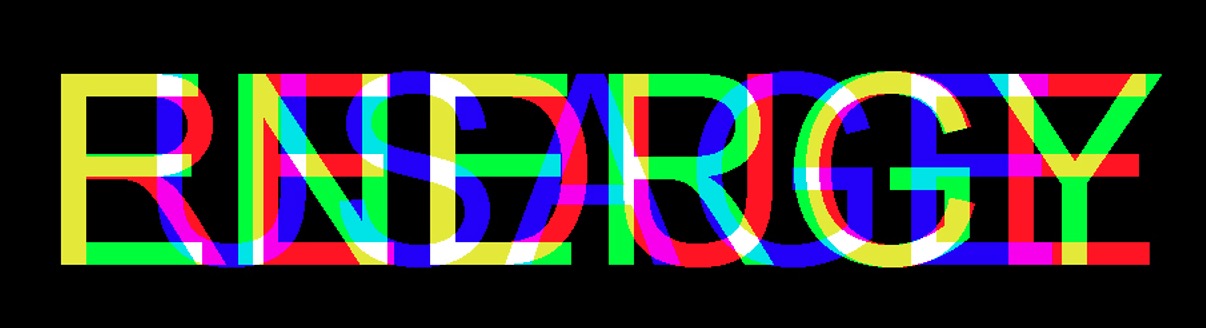
Activity - Seeing through filters
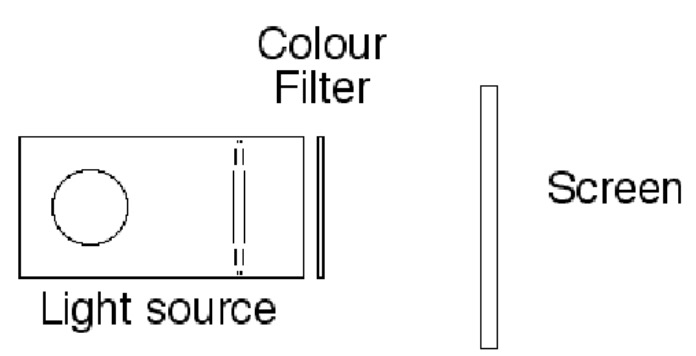
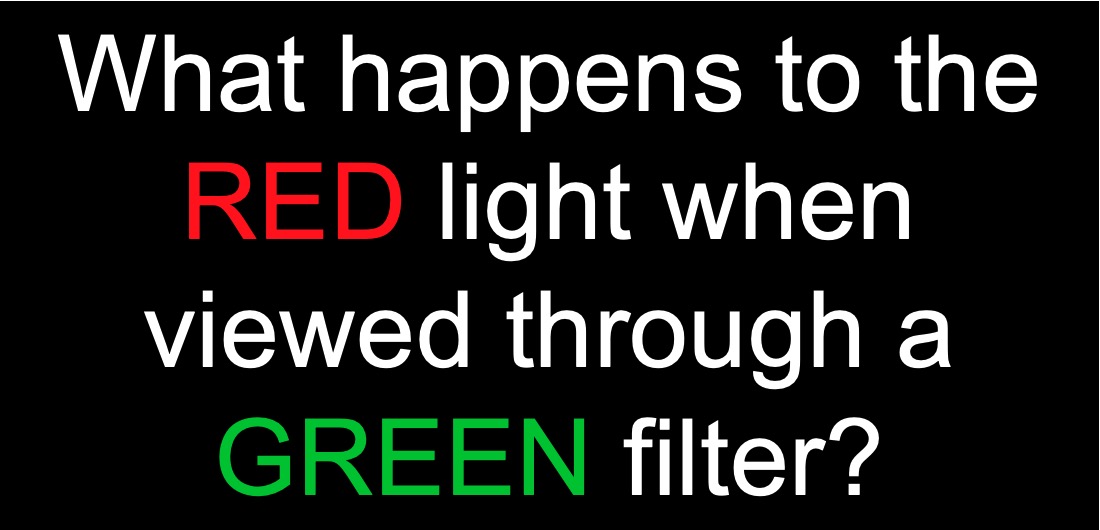
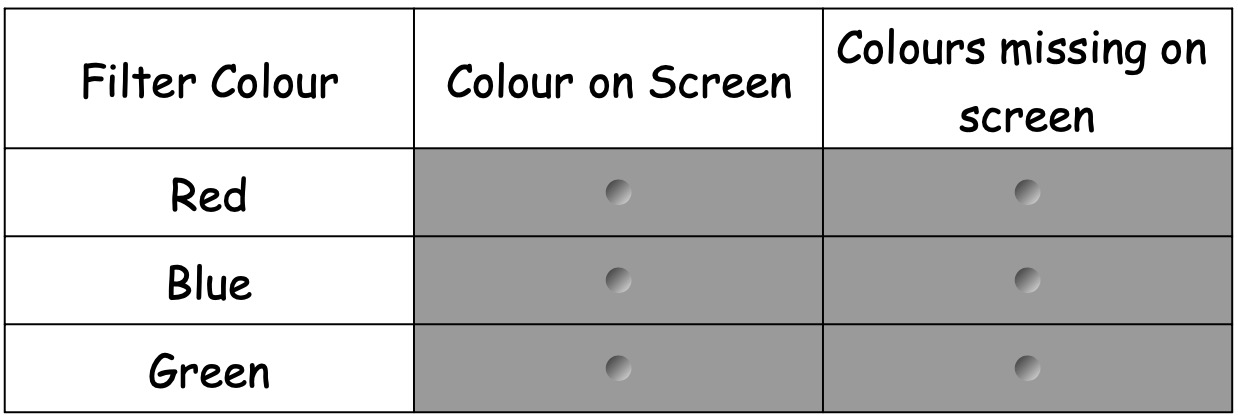
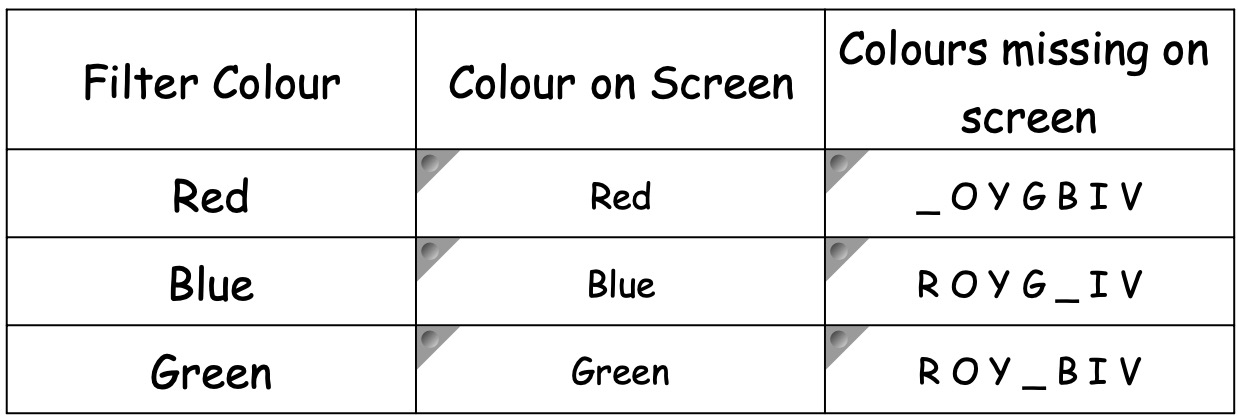
Using your knowledge of white light, identify what colours must be missing on the screen with each of the filters.
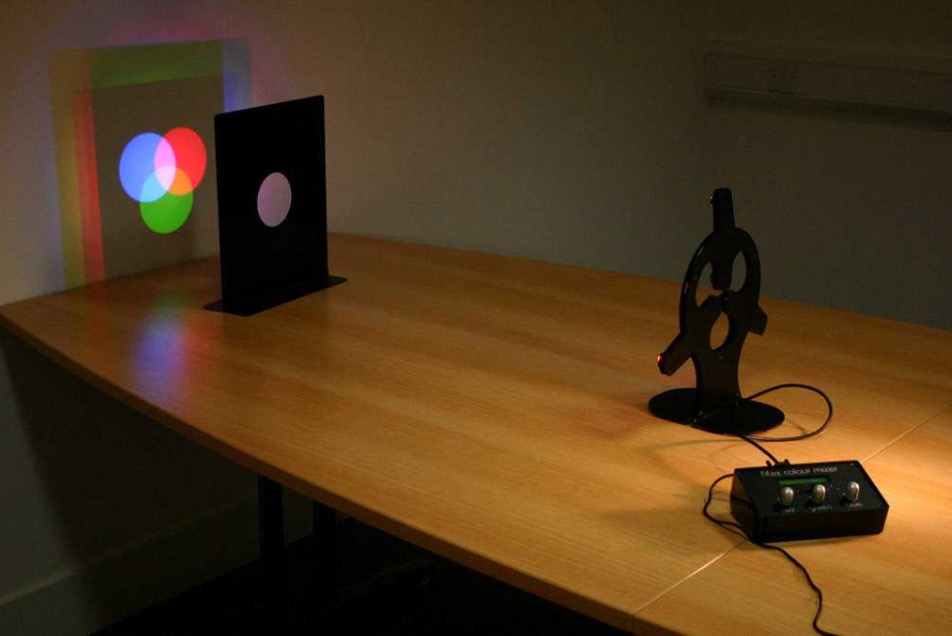
Activity - Colour Mixing
Collect the colour mixing apparatus
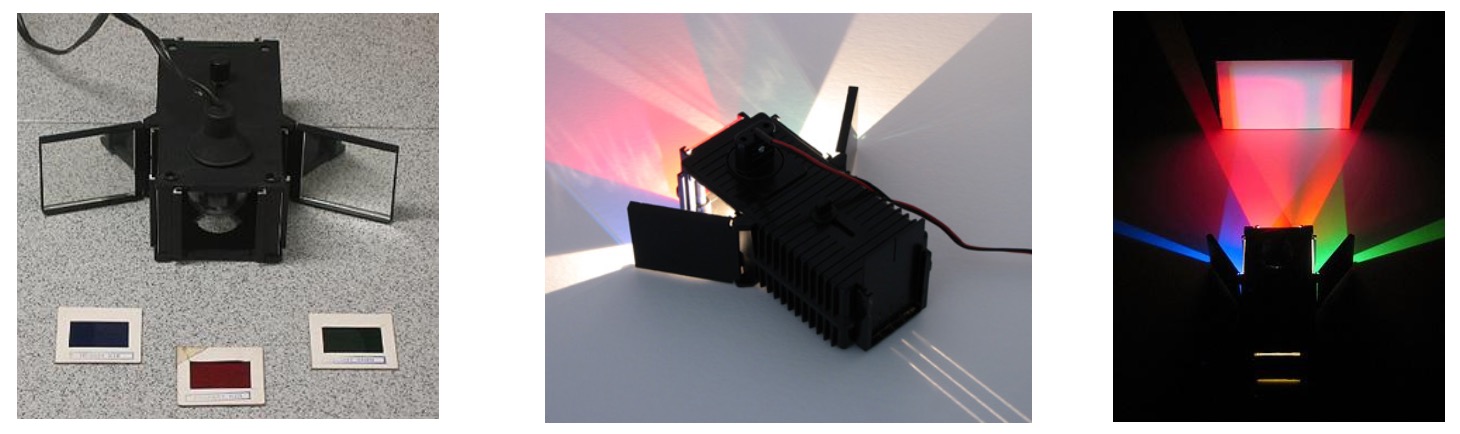
Copy and complete the table below into your notes
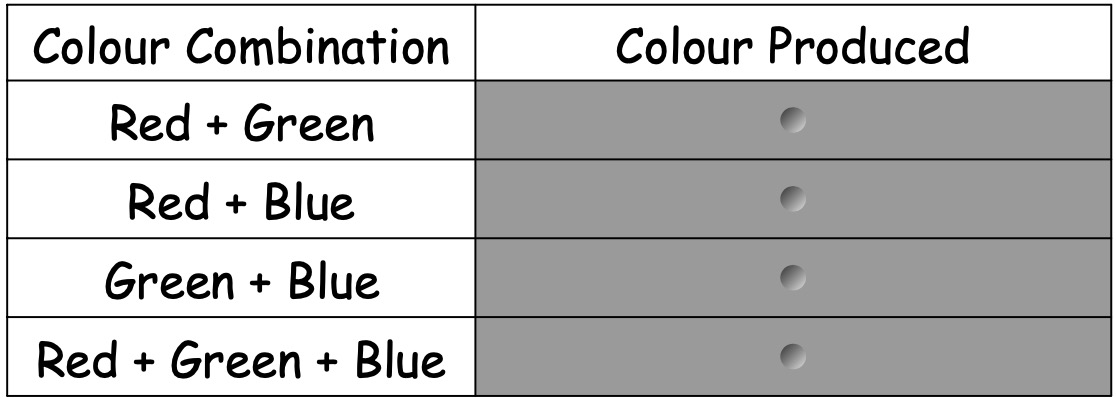
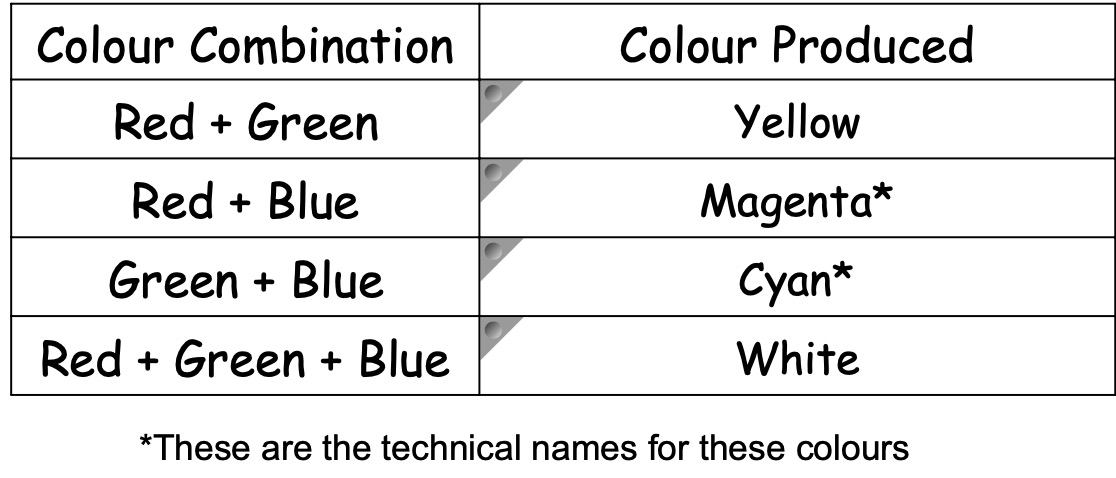
Colour Mixing Demonstration
Watch your teacher demonstrate colour mixing or click on the picture below to take you to a simulation.
Lesson 7 - More About Colour
Learning Intentions
- I will find out how phone cameras only "see" in black and white.
- I will investigate looking at coloured objects through coloured filters.
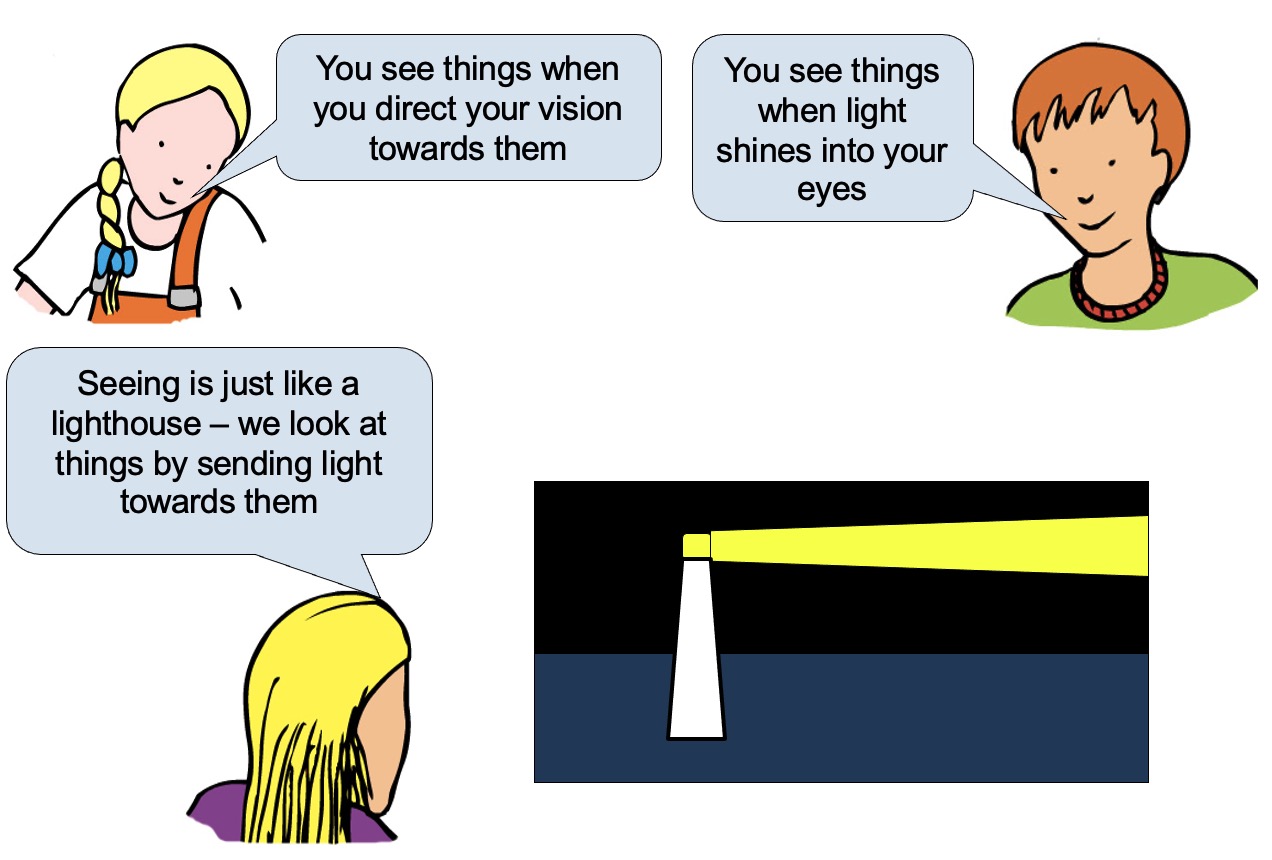
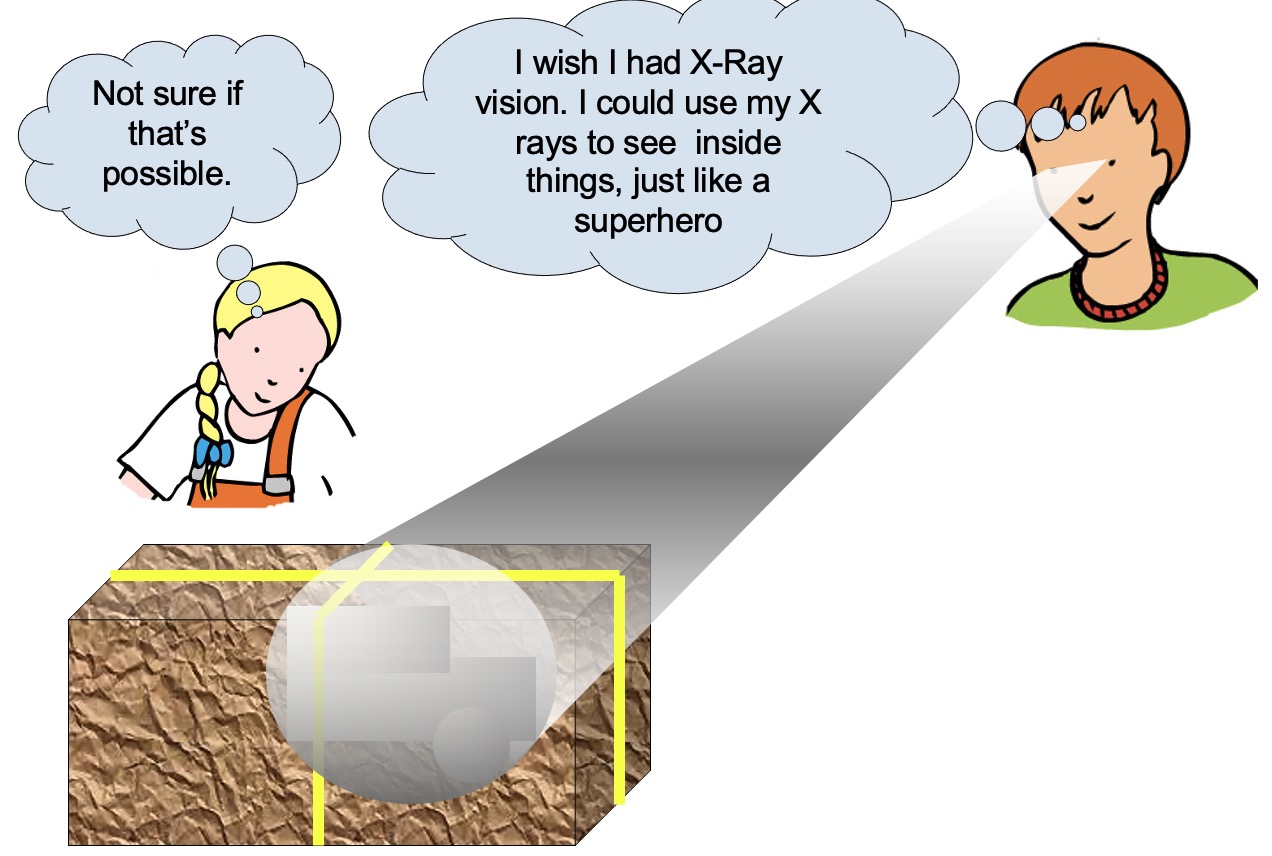
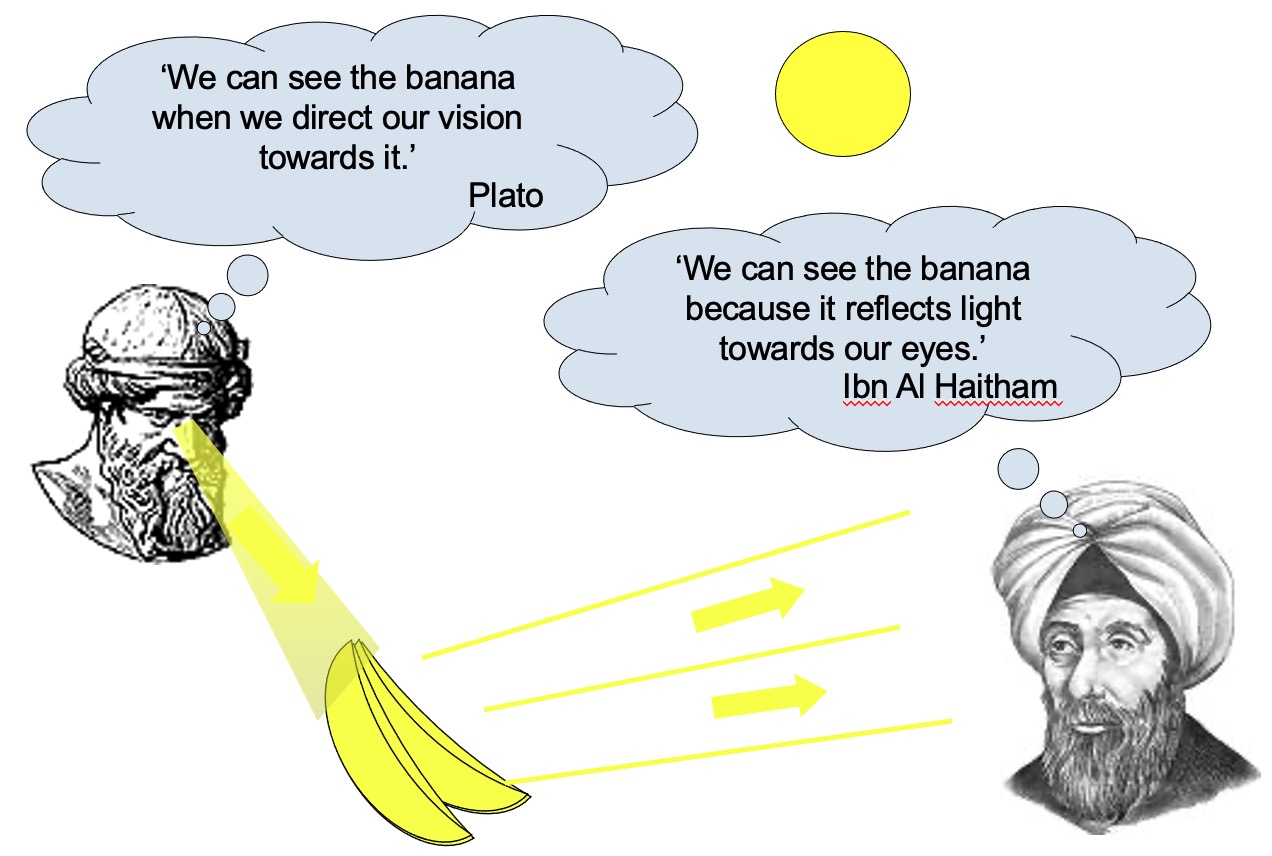
How do we see things?
Seeing colour
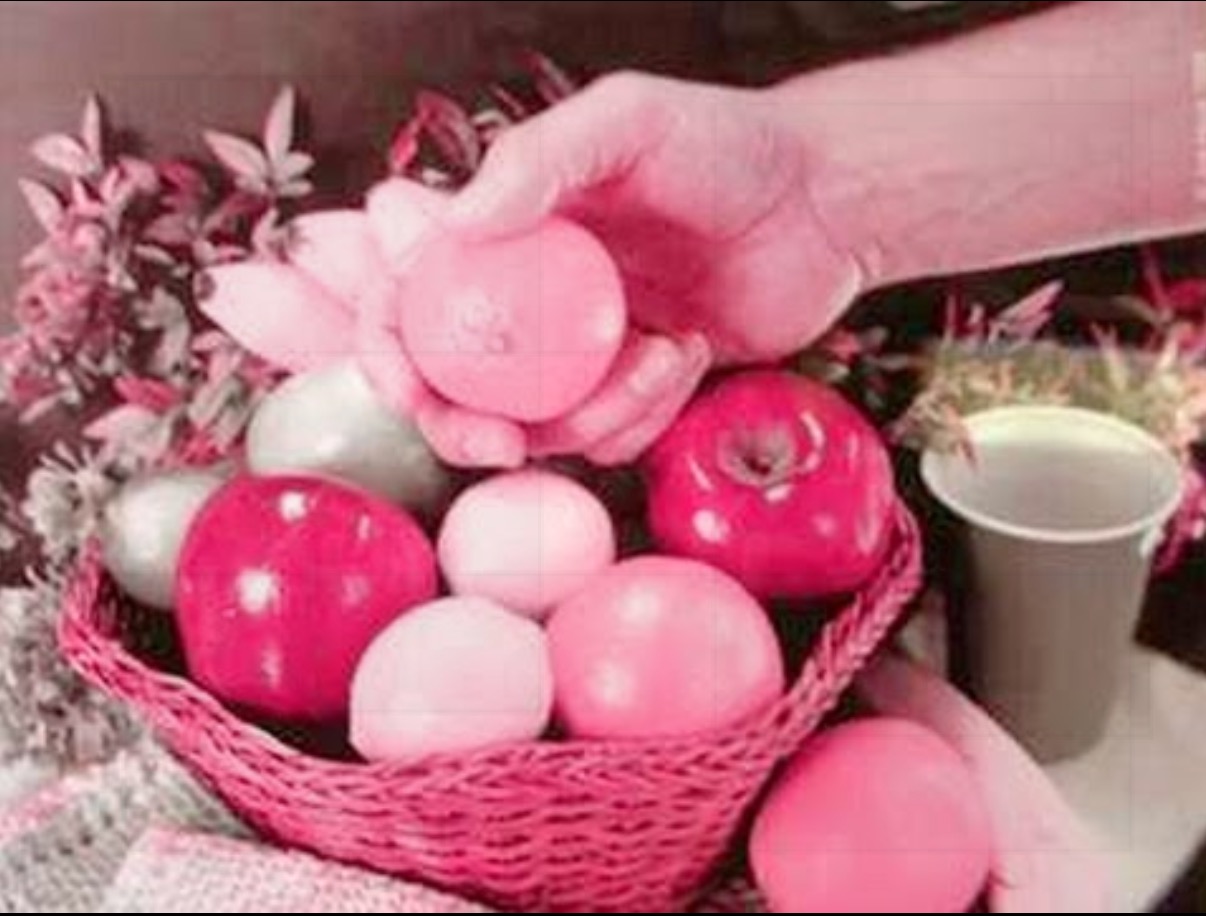
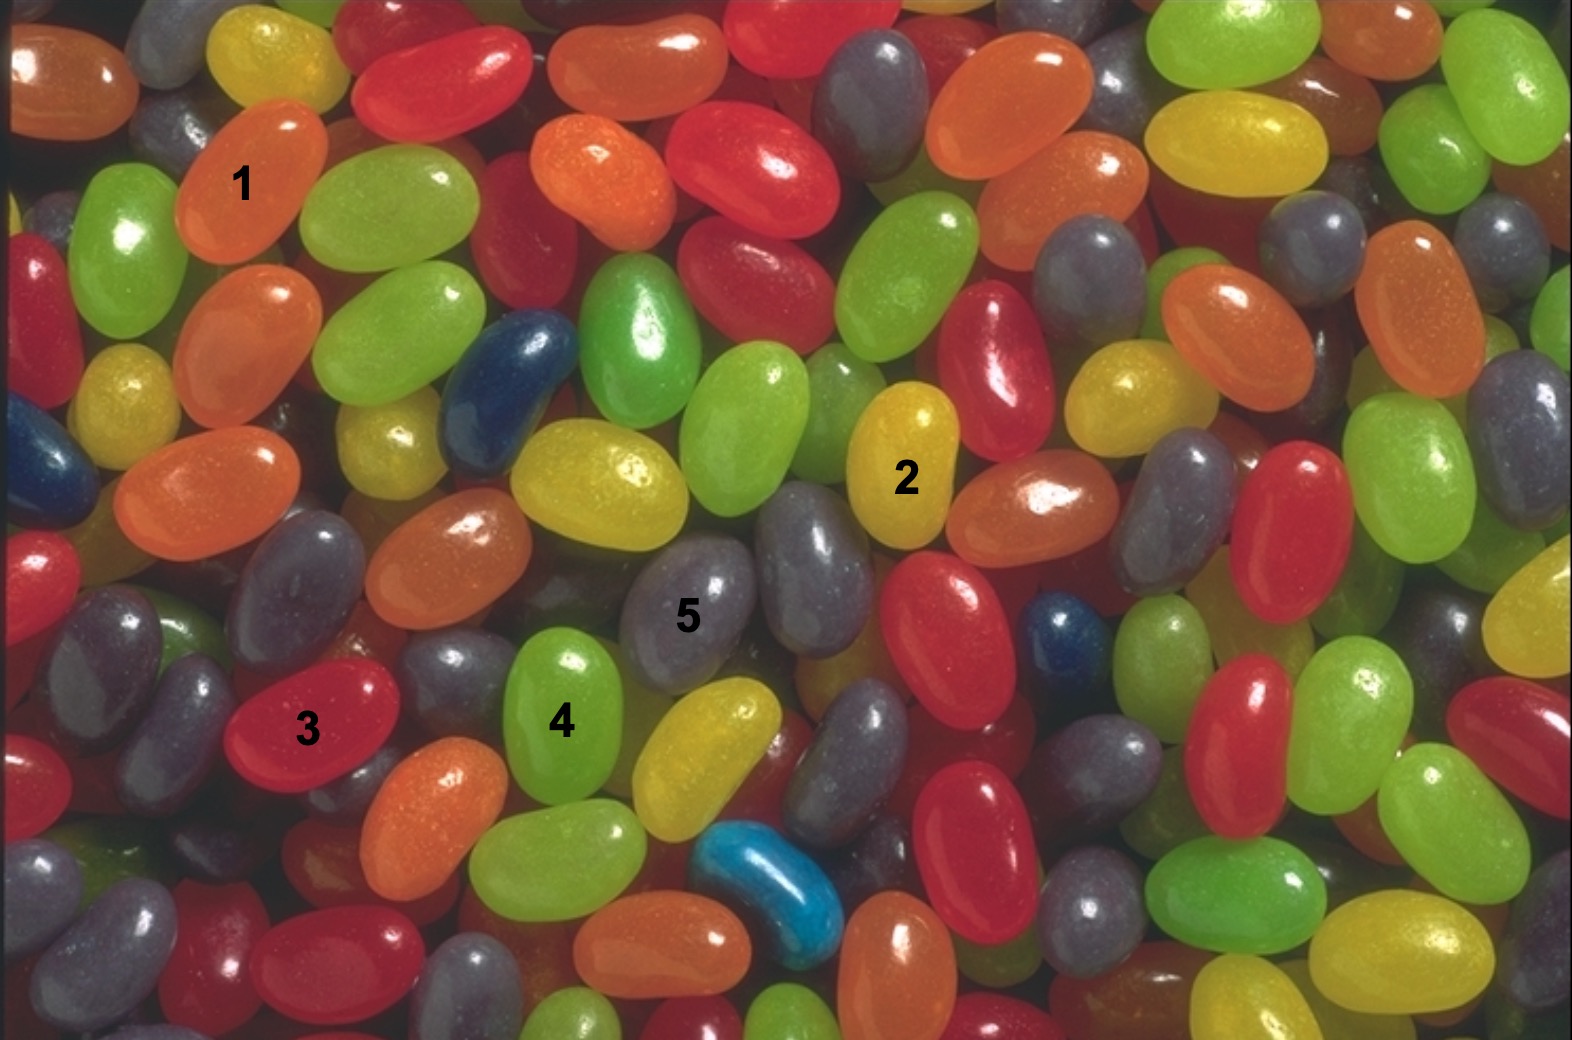
How many colours can you see in the picture below?



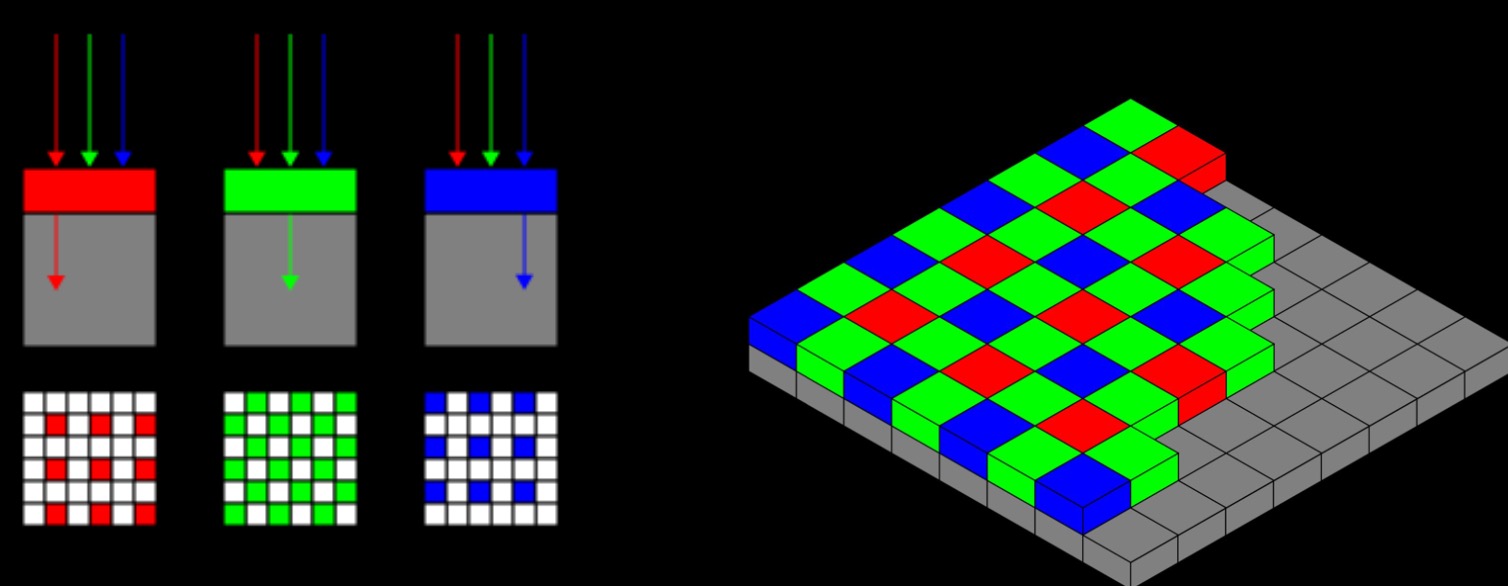
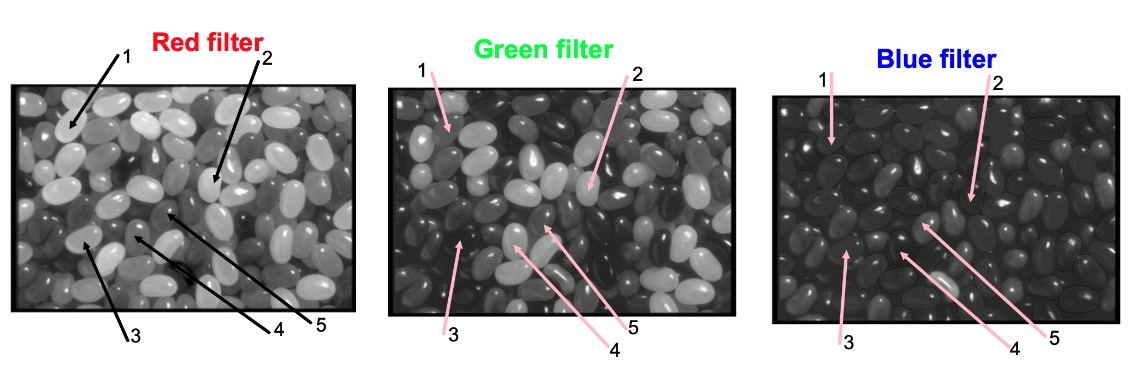
The camera on your phone actually only "sees" in black and white.
Each time it takes a picture, it is really taking three simultaneously; one each through red, green and blue filters.
Clever electronics then recreate a single colour image.
Activity - Being a Phone Camera
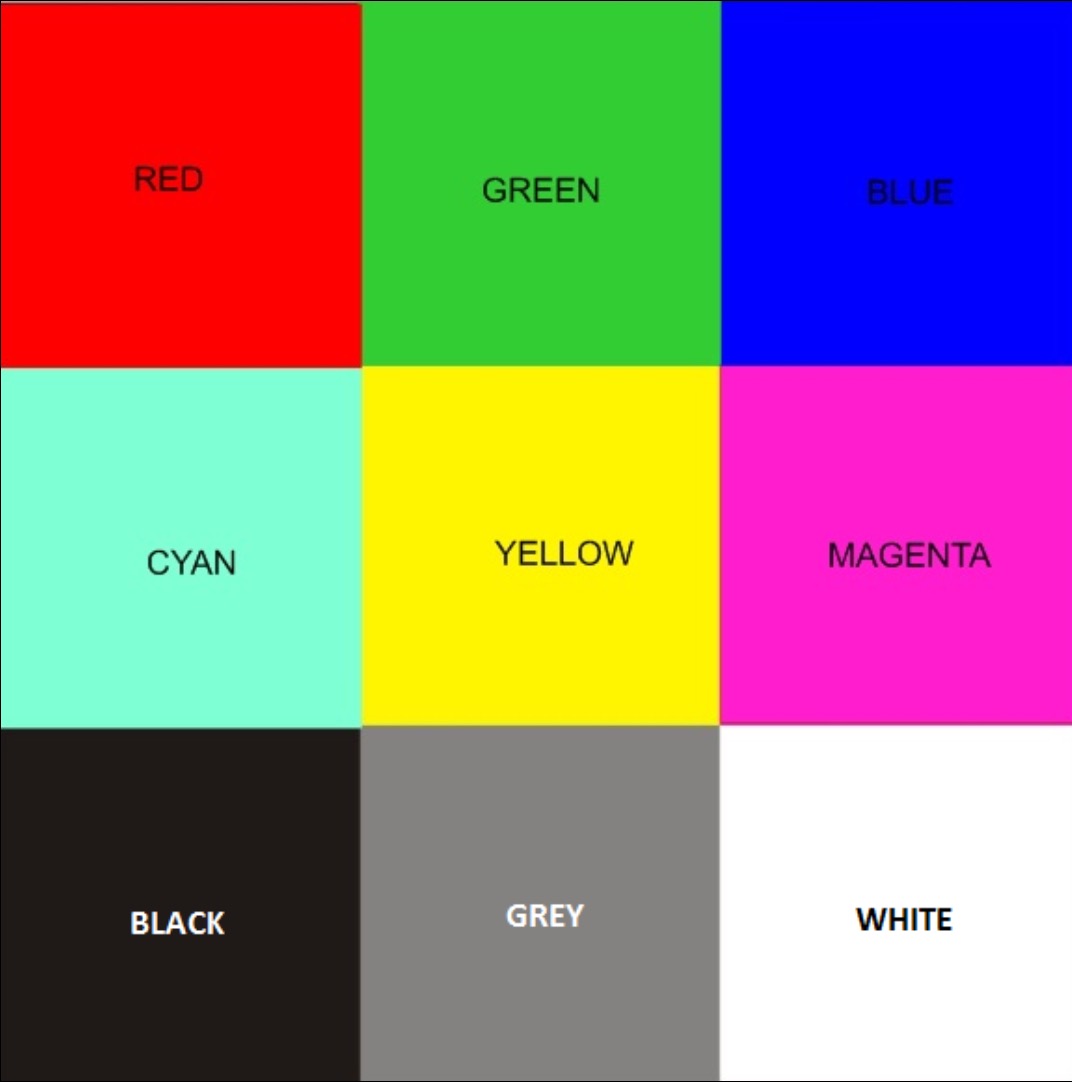
Look at this colour square through first RED then GREEN and finally BLUE filters.
Record on the appropriate table whether each square appears BRIGHT, MID or DARK.
Decide whether the beans are bright, mid or dark and match up with the results from your grids.
Were you right?
Lesson 8 - Describing Waves
Learning Intentions
- State that waves carry energy.
- Measure the wavelength, frequency and amplitude of waves.
Describing Waves
Light, sound, x-rays, radio signals all travel as waves.
Before we look at waves of different types we must know how to describe waves.
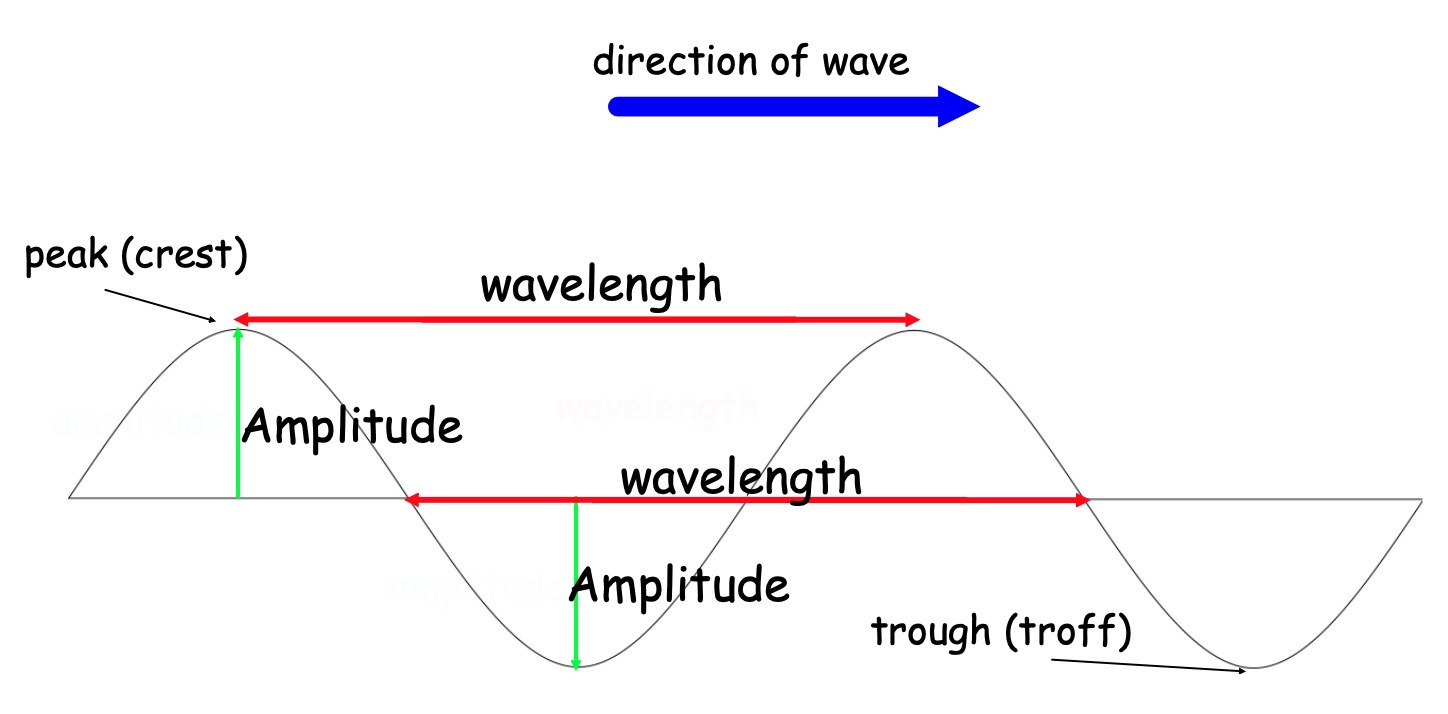
Collect this diagram, label it, and stick it into your jotter.
The number of waves that pass a point every second is called the frequency.
For light the frequency determines the colour of the wave, and the amplitude determines the brightness.
Example 1
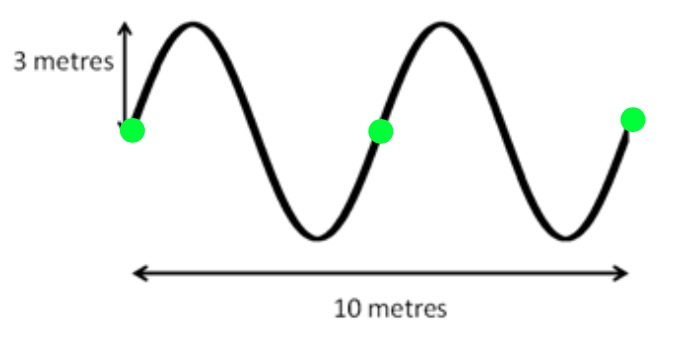
(a) How many complete waves are shown in the diagram above?
(b) What is the wavelength of the wave?
(c) What is the amplitude of the wave?
Example 2
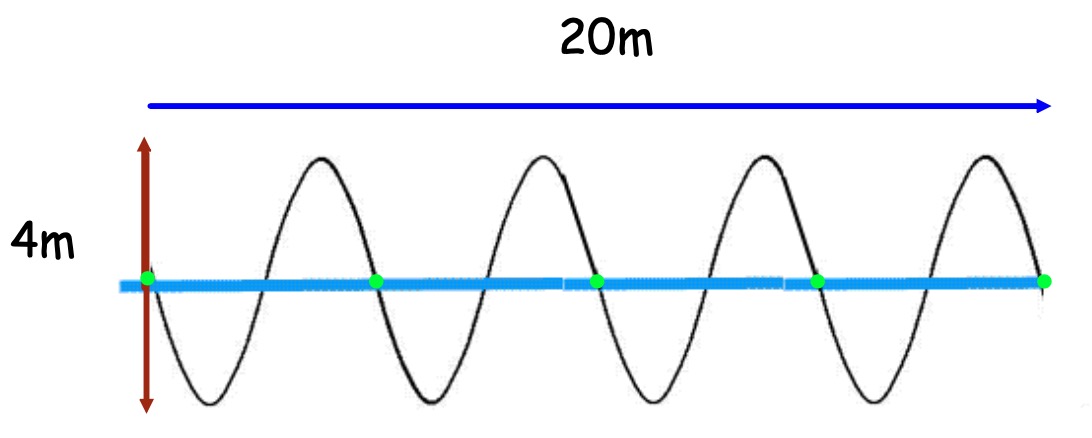
a) How many waves are shown in the diagram above?
b) What is the length of each wave (wavelength)?
c) What is the amplitude of the wave?
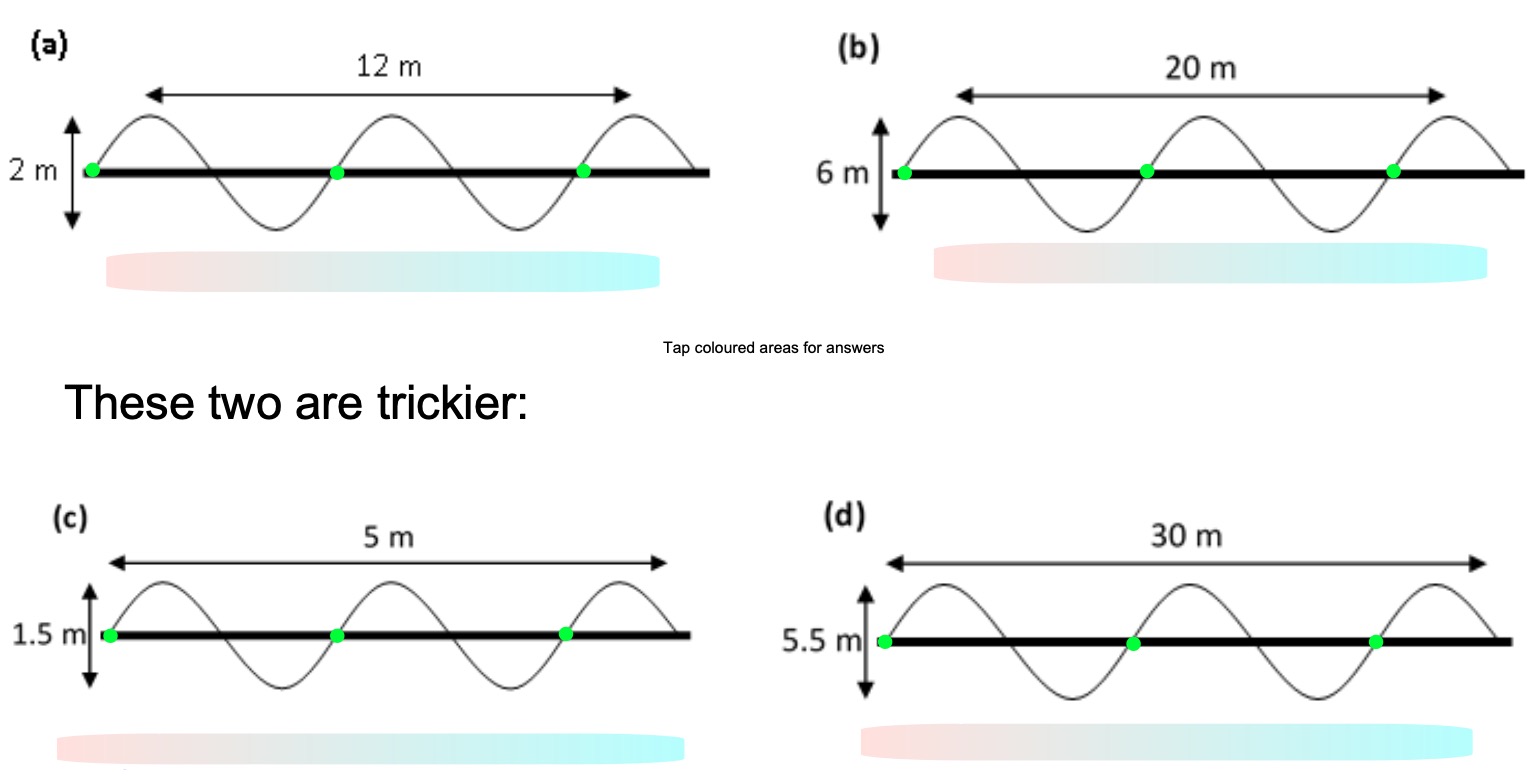
More Wavelength and Amplitude Examples
Find the amplitude and wavelength of these waves:
Notes - Frequency
Frequency is the number of times something happens per second. The unit of frequency is hertz (Hz).
1 hertz is 1 per second.
We can use this equation to help us calculate the frequency:
Frequency = Number of waves ÷ Time taken
Example 3
Four waves are produced in 2 seconds, what is the frequency ?
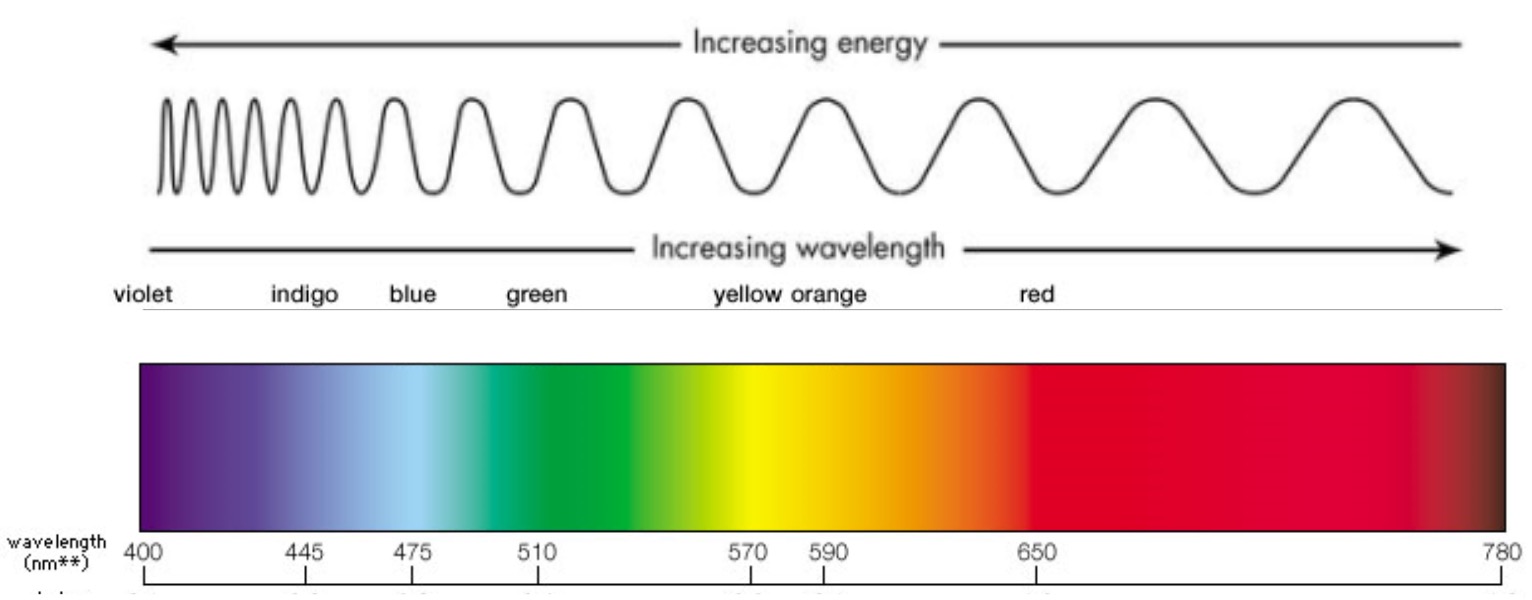
The Electromagnetic Spectrum
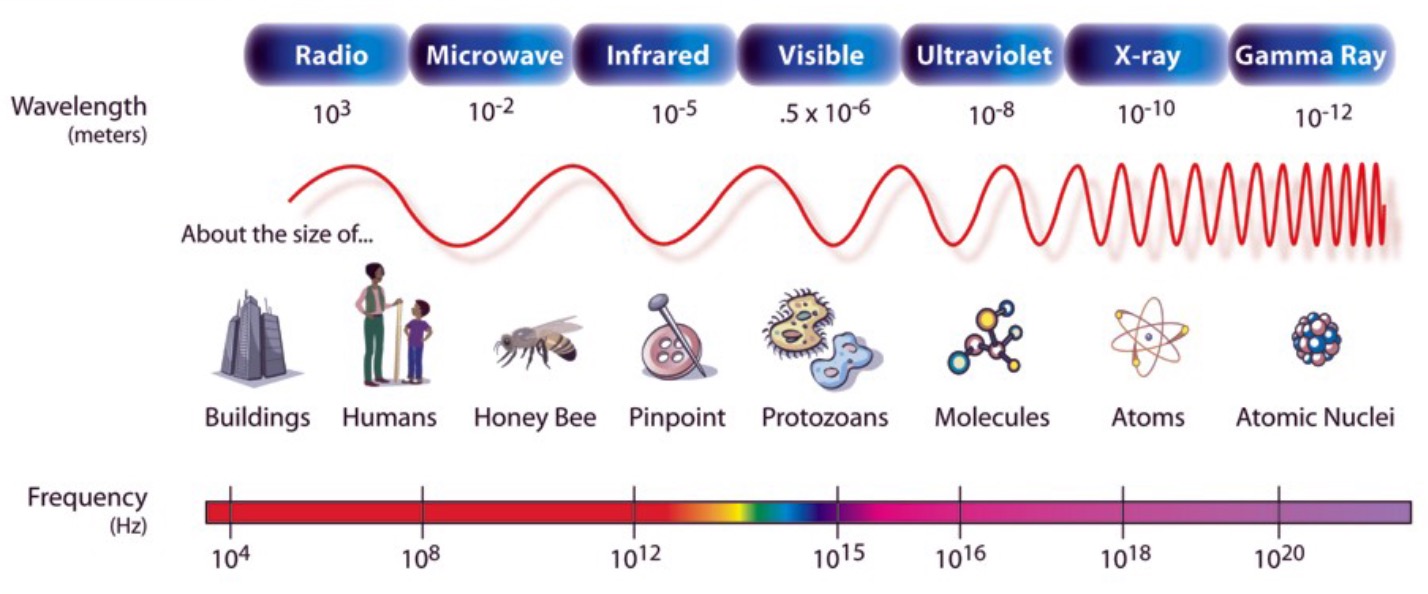
The frequency, wavelength and energy of a wave are all related. As the frequency of a wave increases, the wavelength gets shorter. As there are more waves per second, more energy is transferred.